


Desaturating an image, as you know, is very easy. Just press CTR+SHIFT+U. This is a shortcut. But what if you want to blend the black and white with the color? That can be done too in Photoshop.

You can go to Image>Adjustments>Desaturate. I have also shown how you can restore color after desaturating an image. You will find it here.
The purpose of this tutorial is to blend the desaturated part with color still remaining.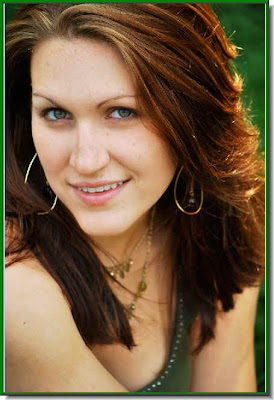
The purpose of this tutorial is to blend the desaturated part with color still remaining.
Step 1 : I have opened this free stock image in Photoshop. You can download it from here.
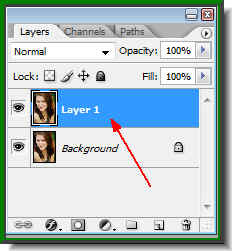 Step 2 : Press CTRL+J. The Background Layer is duplicated as Layer1.
 Step 3 : Press CTRL+SHIFT+U to desaturate Layer1, which is one we are on. A Layer you are working on is always highlighted.
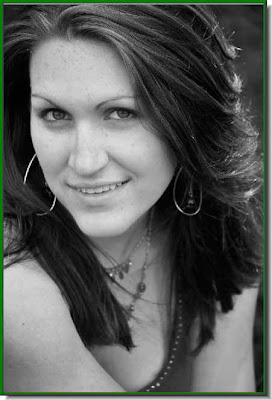 The image has been desaturated.
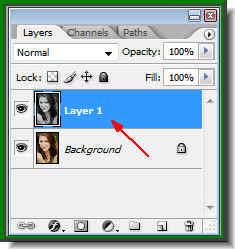
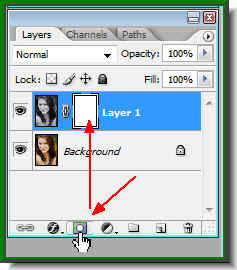 Step 4 : Click the Add Layer Mask Button and a Layer Mask forms next to the Layer thumbnail on Layer1.
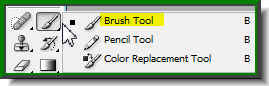 Step 5 : Now click the Brush Tool.
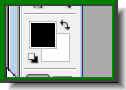 Step 6 : Make sure that the Foreground Color is set to Black and Background to White.
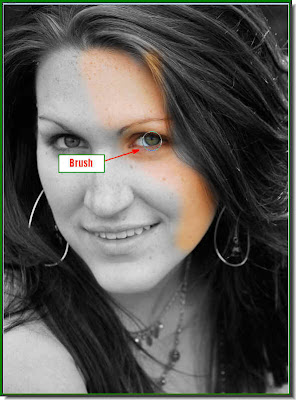 Step 7 : Now begin painting with the Brush Tool. To make the brush size large press ] (right bracket key) and to make it small [ (left bracket key). The brush tip should be soft. To make the brush tip soft press Shift+[, to make it hard press Shift+]. Here we need a soft brush. What you are actually doing is is brushing away portions of the desaturated image to reveal the color image beneath it.
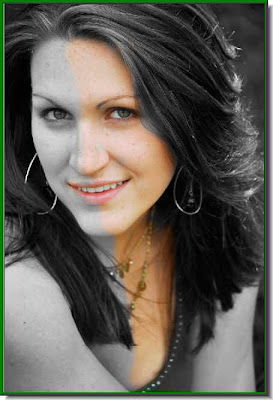 This is how the image looks. It looks awkward. The colored part looks very sharp against the desaturated portions.
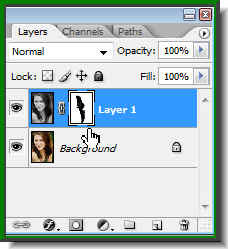 Step 8 : Now click on the Layer Mask. As soon as you do you will find a thin border around it. It means that the Layer Mask is active.
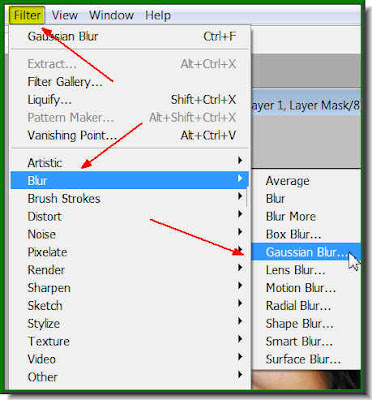 Step 9 : Go to Filter>Gaussian Blur.
Step 2 : Press CTRL+J. The Background Layer is duplicated as Layer1. Step 3 : Press CTRL+SHIFT+U to desaturate Layer1, which is one we are on. A Layer you are working on is always highlighted. The image has been desaturated. Step 4 : Click the Add Layer Mask Button and a Layer Mask forms next to the Layer thumbnail on Layer1. Step 5 : Now click the Brush Tool. Step 6 : Make sure that the Foreground Color is set to Black and Background to White.Step 7 : Now begin painting with the Brush Tool. To make the brush size large press ] (right bracket key) and to make it small [ (left bracket key). The brush tip should be soft. To make the brush tip soft press Shift+[, to make it hard press Shift+]. Here we need a soft brush. What you are actually doing is is brushing away portions of the desaturated image to reveal the color image beneath it.This is how the image looks. It looks awkward. The colored part looks very sharp against the desaturated portions.Step 8 : Now click on the Layer Mask. As soon as you do you will find a thin border around it. It means that the Layer Mask is active.Step 9 : Go to Filter>Gaussian Blur.
Step 10 : The Gaussian Blur dialogue box opens. Drag the Radius slider to the right till you have a satisfactory result. You will be able to see the effect on your image as you drag the slider. Click ok when satisfied.
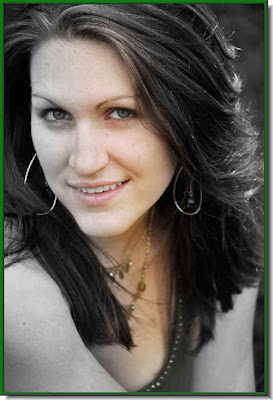 This is how the image looks.
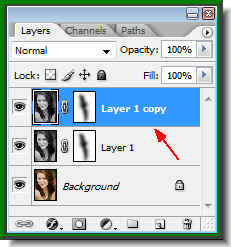 Step 11 : Press CTRL+J. This duplicates Layer1 to Layer1 copy.
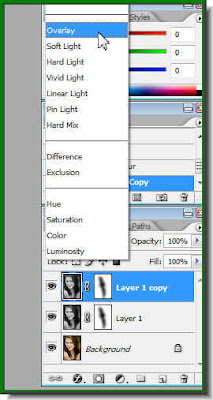 Step 12 : Now click the Blend Mode in the Layers pallette and click on Overlay or Soft Light.
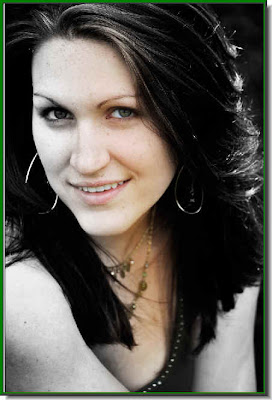
And this is the image. The color blends seamlessly with the desaturated portions. But one more step is necessary. The photo looks too faded.
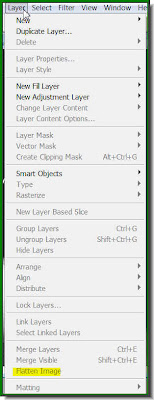
Step 13 : Go to Layer>Flatten Image.
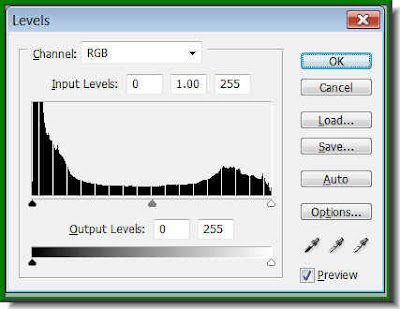
Step 14 : Press CTRL+L. The Levels dialogue box opens. The black arrow at the left is to darken the image, the white one on the right is to lighten the image. The grey arrow in the middle increases or reduces the highlights depending on whether you pull it to the left or right.
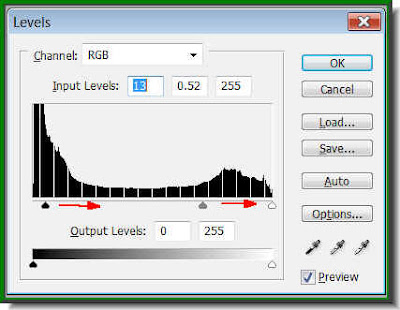
Step15 : Now drag the Grey slider to the right first. This will reduce the highlights in the image, then drag the Black slider slightly towards the right. You will be able to see the effect on the image. Click ok when satisfied. There the entire image looks brighter. That's all. Try it out.
Other Photoshop tutorials are here.


