


How about a tattoo on your body? Too squeamish to try it? Afraid that it will hurt? Just use Photoshop. No pain at all. Tattoo any part of your body. To do this download some free tattoo brushes from here.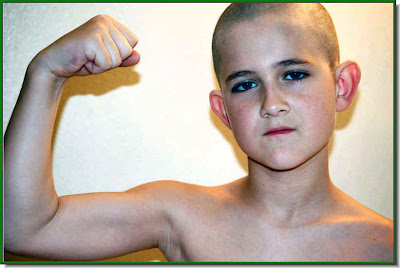
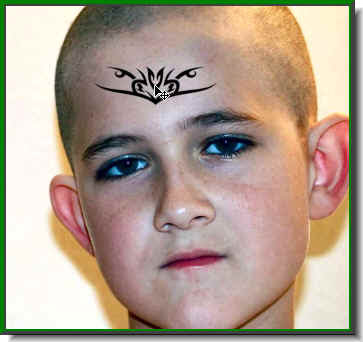
Download this free stock photo from here.
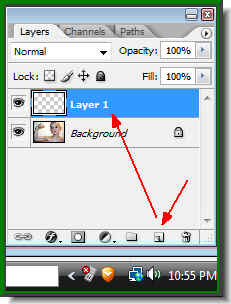 Step 1 : Create a new layer by clicking the New Layer button and a new Layer 1 forms.
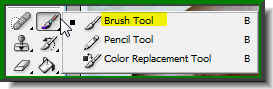
 Step 2 : Click on the Brush Tool and then click the Brush icon on the right of the top panel.
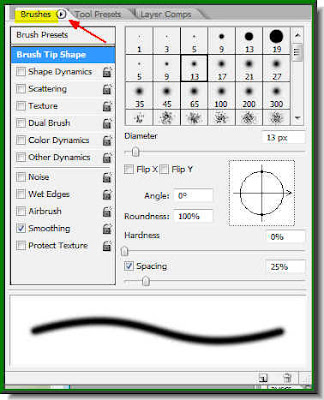 Step 3 : When you click the icon on the top panel the Brushes dialogue box opens. Click the tiny Black arrow where the Red arrow points to.
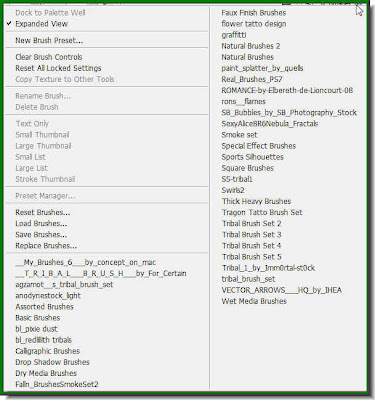 Step 4 : This opens up the Brush Sets available in your version of Photoshop. It also contains the Brushes I asked you to download.
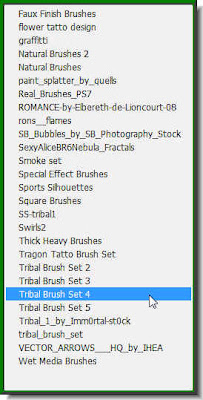 Step 5 : I have clicked on a Brush set I downloaded.
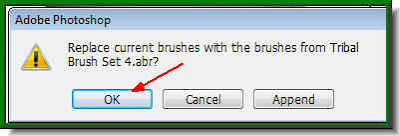 Step 6 : As soon as I click on the Brush set, this dialogue box opens up. Click ok.
Step 7 : As soon as you click, this dialogue box opens. Click on a Brush and drag the Spacing slider as shown.
 Step 8 : Now click just once with the Brush. If the brush Tip is too large, reduce the size by pressing the [ (left bracket key). If it is small increase the tip size by pressing the ] (right bracket key).
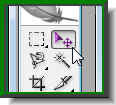 Step 9 : Click the Move Tool.
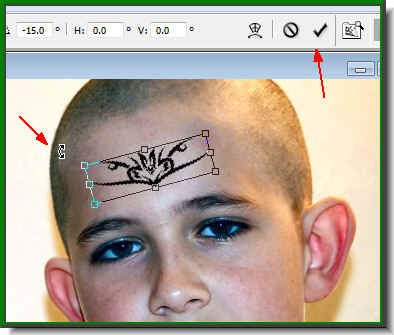 Step 10 : As soon as you click the Move Tool a selection forms. If you hover the cursor at any of the corners, a small bent arrow appears. By moving it you can change the angle of the 'tattoo' as well as its size by dragging to the left or right, top or bottom.. It is now aligned to the tilt of the forehead. To apply the tansformation click a Tick mark that appears on the top panel.
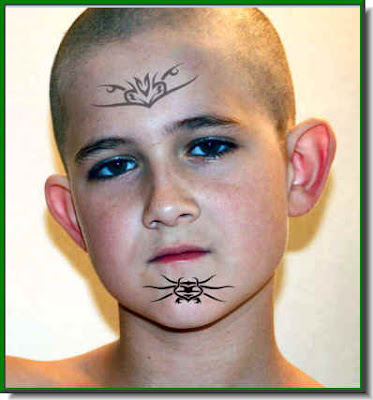
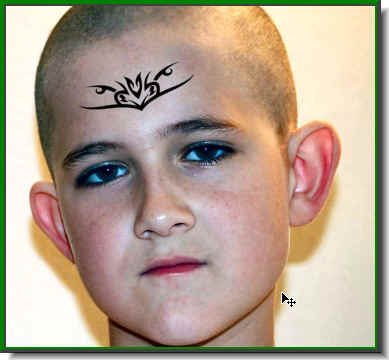 This is how the tattoo looks.
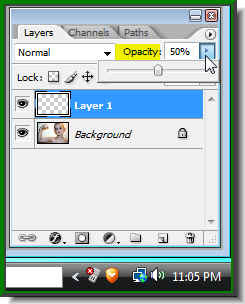 Step 11 : Now lower the opacity of layer 1 on which the tatto is by 50%.
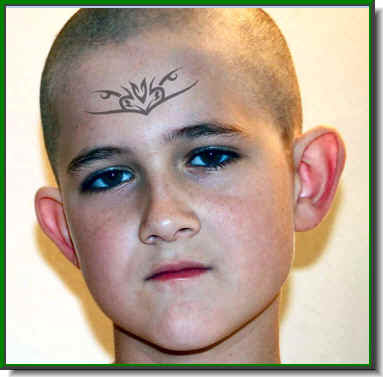 By reducing the opacity, the tattoo looks more realistic.
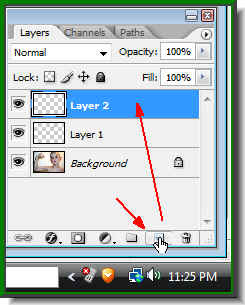 Step 12 : Make another new layer. A new layer 2 forms.
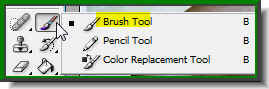 Step 13 : Click the Brush Tool again.
Step 14 : Open the Brush sets dialogue now and click on a Brush and drag the Spacing slider again.
Step 15 : Again click just once adding the second tattoo.
Step 16 : Again resize the tattoo with the Move Tool and lower the opacity of the layer to 50% as shown in the earlier steps.

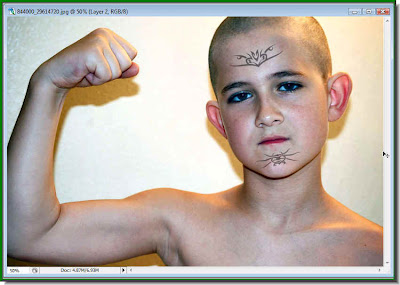
Step 17 : Now you can add any number of tattoos you want, but make sure that each tattoo is on a new layer.
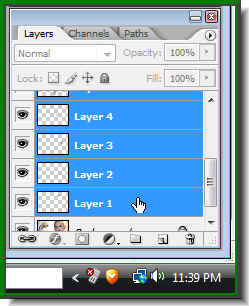
Step 18 : Now click the first tattoo layer. Press shift and click the last tattoo layer. This will select and highlight all the tattoo layers.
Step 19 : Press CTRL+E. This will compress all the tattoo layers into one.
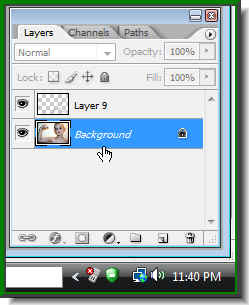
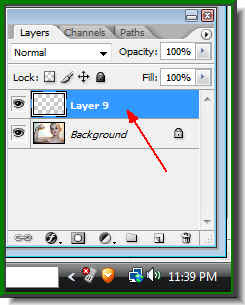
Step 20 : Click on the Background layer.
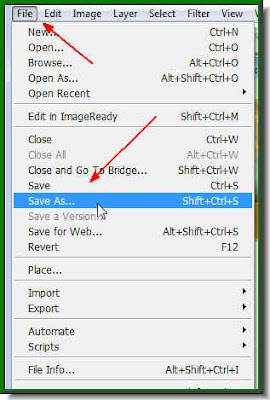
Step 21 : Go to File>Save As
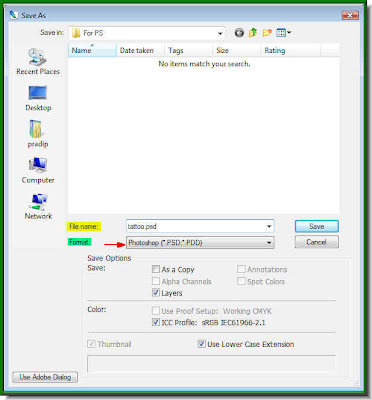
Step 22 : You will prompted to save the layer as a psd file. Save it wherever olike but give it a name. I am saving the layer as tattoo.psd Click ok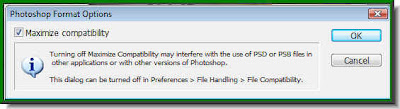
Step 23 : This dialogue box, opens. Click ok.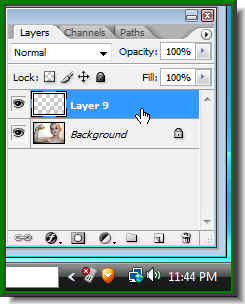
Step 24 : Now click on Layer1
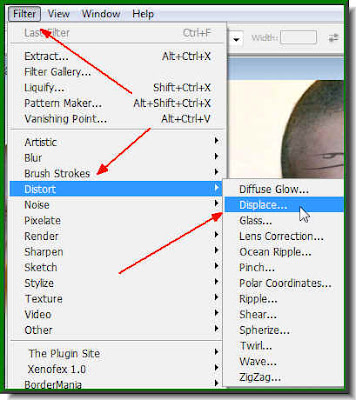
Step 25 : Go to Filter>Distort>Displace.
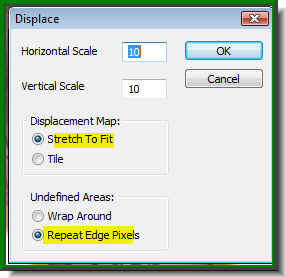
Step 26 : This dialgue box pops up. Give the settings as above and click ok.
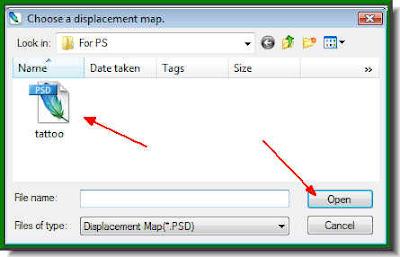
Step 27 : This dialogue box opens. I can see the Tattoo psd file. Click on it.
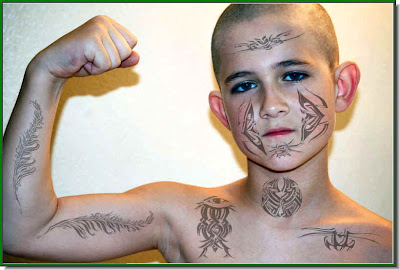
The final image. What I have done is make the tattoos fit to the contours of the body, otherwise it would look awkward.
If you want the tattoo to be in color do the following steps also.
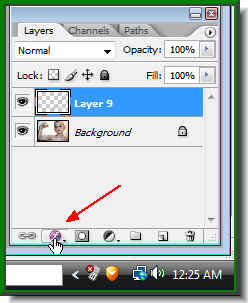 Step 28 : Click the Add Layer Style button.
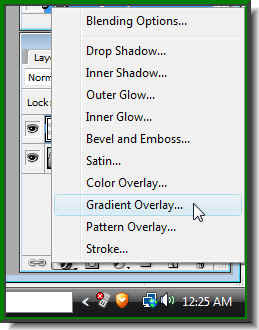 Step 29 : From the popup click on Gradient Overlay.
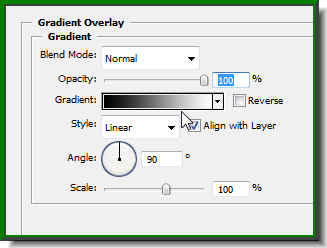 Step 30 : This dialogue box opens. Click on where the white arrow points to bring up the Gradient Editor.
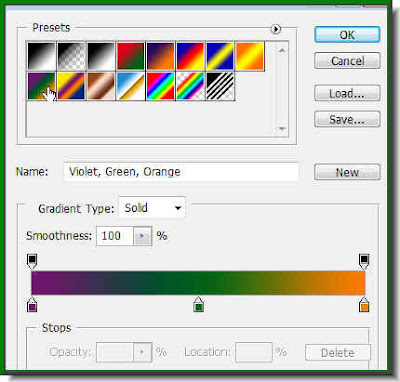 Step 31 : From the Presets in the Gradient Editor click on any, only make sure that it matches your image. Click ok.
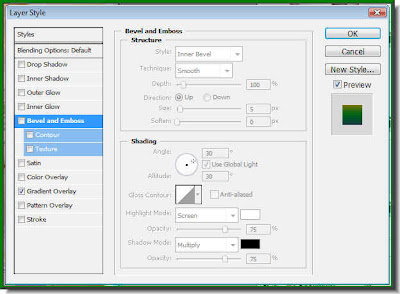 Step 32 : Click ok in the Layer Styles dialogue box.
 Here are the tattoos in color.
That is all. Try it out.
Find other Photoshop tutorials here.


