


Since the last few tutorials have been on the Pen Tool, here's another one with the use of the Paste into command. It is used to paste a photo into a selected area -- like say your photo on a signboard. But the Paste Into command option is usually grayed out. 
If you click on Edit you will find the Paste Into command, but it is greyed out as you can see. We will make this command active.
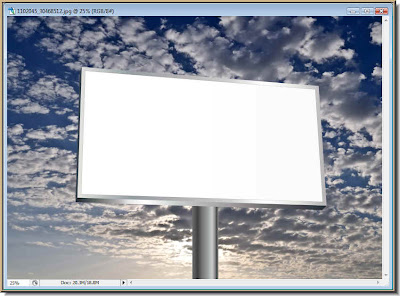 Step 1 : I have opened this free stock image of a signboard against the sky. It will do admirably. You will find the image here for download.
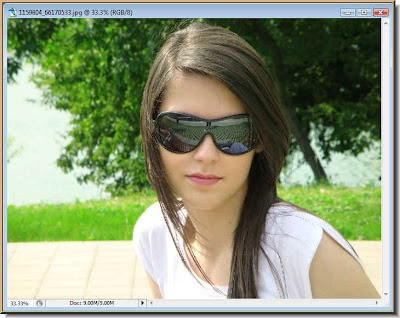 Step 2 : This is a second image that I will be using. You can download it from here.
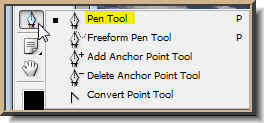 Step 3. Click on the Pen Tool.
 Click the Paths icon in the top panel.
 Step 4 : I have clicked exactly in the left top corner with the Pen Tool.
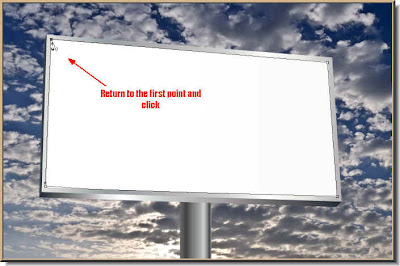 Step 5 : I have clicked on the other three corners of the signboard with the Pen Tool till I come back to the first point. As soon as come back to the first point, you will find a small 'o' beside the Pen Tool. It means that the Path will be closed.
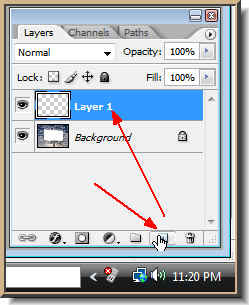
Step 6 : Click on the Add New Layer button and a new Layer 1 forms.
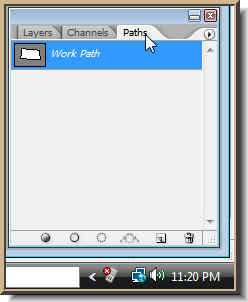 Step 7 : Now go to the Paths pallette. It is different from the Layers pallette. You can see the thumbnail and the Workpath.
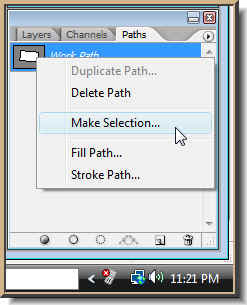 Step 8 : Right click the Workpath and this dialogue box opens. Click on Make Selection.
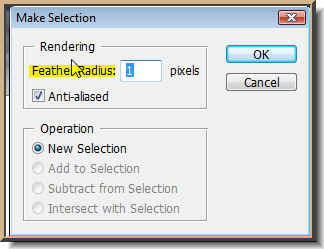 Step 9 : As soon as you click this dialogue box pops up. Set the Feather Radius at 1 pixel. Click ok.
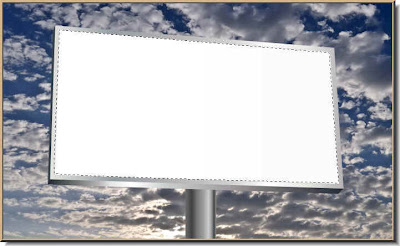 Step 10 : As soon as you click ok, a column of marching ants surround the selection you made with the Pen Tool all around the inside of the signboard.
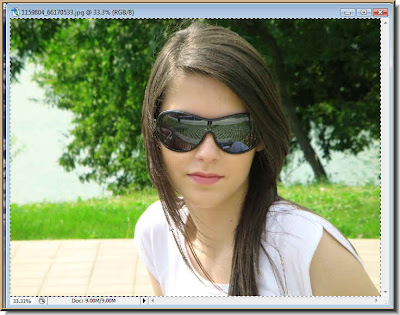 Step 11 : Now bring up the other image. Press CTRL+A. You will find a selection of marching ants around the image. Now press CTRL+C and minimise the image.
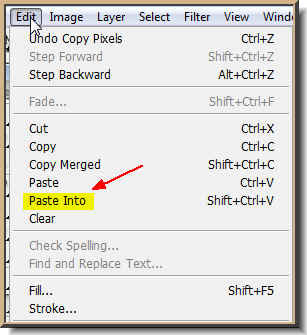 Step 12 : Now go to Edit>Paste Into. Paste Into is no longer greyed out.
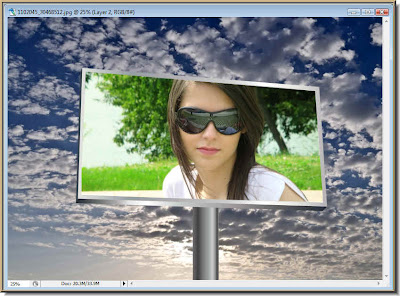 Step 13 : As soon as you click, the photo of the girl appears inside the signboard.
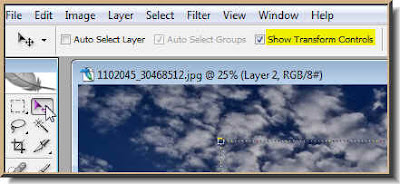 Step 14 : Click on the Move Tool (white arrow). Now check the Show Transform Controls if you are using CS or Bounding Box, found in the same place in PS7.
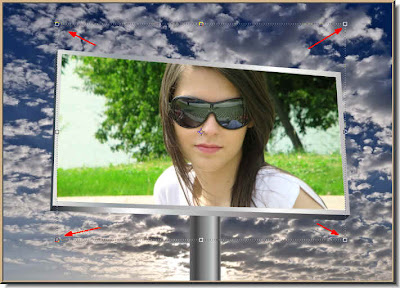
Step 15 : As soon as you click, you will find a thin selection. See where the red arrows point to. That is parts of the image you can no longer see.
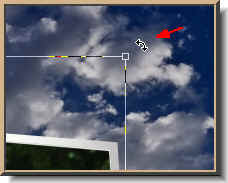 Step 16 : Click the Move Tool and hover your cursor on a corner. A tiny double-headed arrow appears. By dragging this arrow to the left or right you can change the angle of the girl's photo.
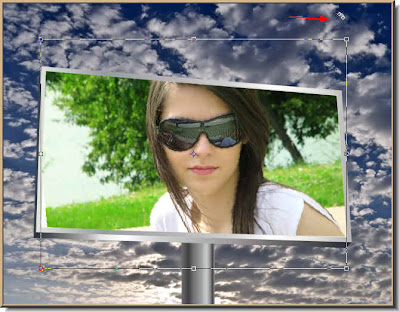 Step 17 : You can see that the angle of the girl's photo has changed.
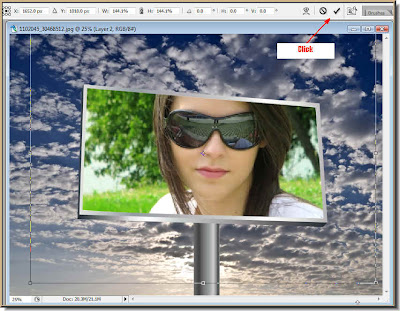 Step 18 : You can press SHIFT+ALT and drag a corner handle, this will make the photo larger proportionately. The girls' image is larger now.
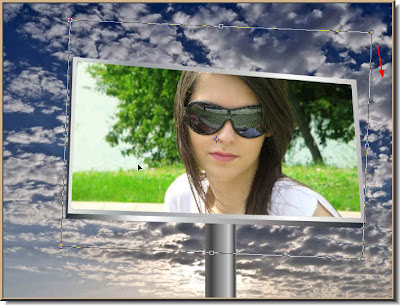 Step 19 : I have dragged back on the handle keeping SHIFT and ALT pressed to make the image of the girl smaller.
 Step 20 : This step is possible for CS users, it cannot be done by PS7 users. You can try Levels though. For CS users go to Image>Adjustments>Match Color.
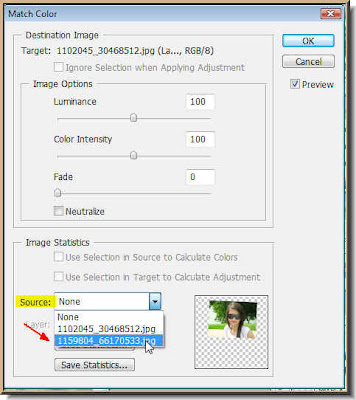 Step 21 : The Match Color dialogue box opens. Change the source to the other image. All images that you open in PS have a name, so you can ascertain which is the other image.
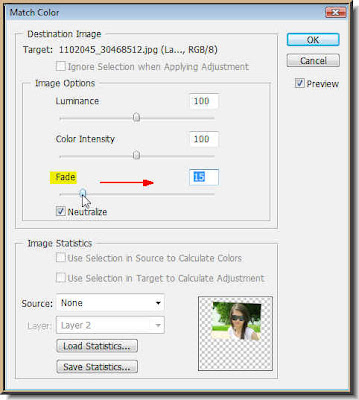 Step 22 : Check the Neutralise and drag the Fade slider suitably. There is nothing hard and fast about it. The tones should either match or complement each other. When you are satisfied click ok.
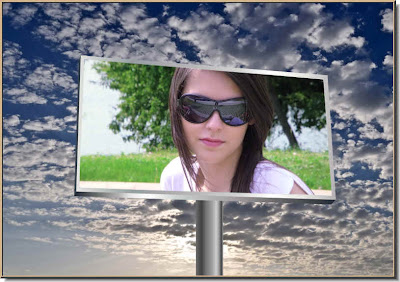 The girls's image has a shade more blue. Compare it with the original and you can spot the difference.
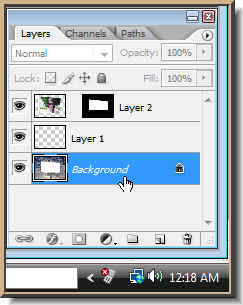 Step 23 : Click on the Background layer.
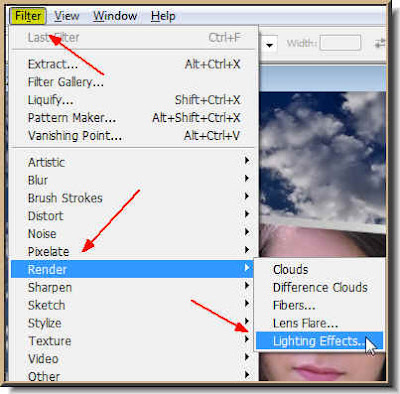 Step 24 : Go to Filter>Render>Lighting Effects.
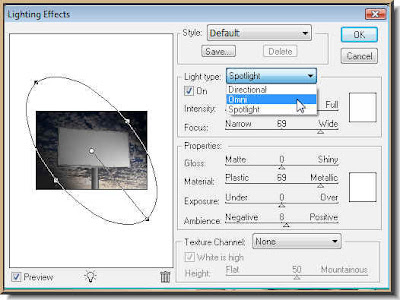 Step 25 : In the Lighting Effects dialogue box change the Light Type to Omni.
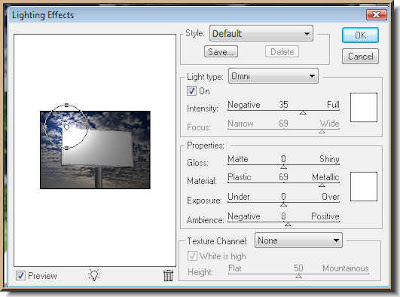 Step 26 : You can move the circle of light at the left with the cursor. You can increase the size of the cirle by dragging on any of the four handles around the circumference. Click ok when satisfied.
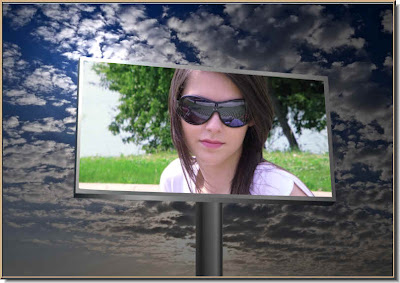
And that is my finished image. You can get a similar effect if you use the same images, or even something different, if you try out variations. That is all.
Try other Photoshop tutorials here.


