Suppose you wish to create a Watermark which you want to apply to multiple images. The easiest way to do it is with Actions. If you have never used Actions in Photoshop just follow along. You can also apply a saved Action on other images too. The only stipulation is that they must all be of the same size for it to work.
Step 1 : We first need to create the Watermark.
Step 2 : In the New Layer dialogue box which opens, I have changed the Preset to Default Photoshop Size.
Step 3 : Change the Background Contents to Transparent from the drop down. Click OK in the New Layer dialogue box.
Step 4 : The Transparent Layer opens.
Step 5 : Click the Horizontal Type Tool.
Step 6 : Draw out the Text Box and Type your Text.
Step 7 : Click the Tick mark in the top Panel.
Step 8 : And here is the Text which I will use as a Watermark.
Step 9 : Go File>Save as.
Step 10 : I have created a Text folder in My Pictures, where I will save the Text. I have given the File name as Text and Format as PNG. I have clicked on the Text Folder where I will save the Text as PNG.
Step 11 : This dialogue box opens. Click OK.
Step 12 : I have opened this free stock image in Photoshop.
Step 13 : Go to Windows>Actions.
Step 14 : The Actions dialogue box opens.
Step 15 : Click the Create new action button shown by the small white hand.
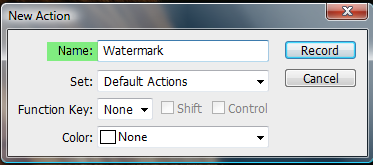
Step 16 : This dialogue box now opens. I have given the Action a name i.e. Watermark. Next click the Record button.
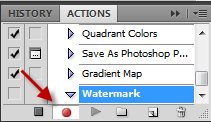
Step 17 : As soon as you click the Record button, this red light shows up. We have now begun to record the Action. You can see the Watermark action also just above it.
Step 18 : Go to File>Open.
Step 19 : I have navigated to the folder where I have kept my Text.
Step 20 : Click the file and click open.
Step 21 : Look at the Actions.It has recorded the 'Open' command. It will go on recording each thing that you do.
Step 22 : The Watermark has opened. Press CTRL+A (Select ALL), press CTL+C (copy)
Step 23 : Go to the image of the girl.
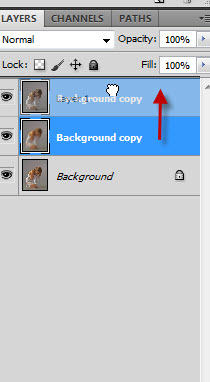
Step 24 : In the Layers palette click on the New Layer icon and a new Layer 1 forms.
Step 25 : Now press CTRL+V (Paste). The text has been pasted on this image. The Text is too small. Press CTRL+T. A selection forms around the Text.
Step 26 : Press SHIFT+ALT and drag down the right bottom corner. Press ENTER.
Step 27 : After you press Enter the Text looks like this.
Step 28 : Click on the Add Layer Style Button. Then click on Blending Options.
Step 29 : The Blending Options dialogue box opens.
Step 30 : Click on the Drop Shadow. I have dragged the Distance, Size and Spread sliders in that order slightly. There is nothing hard and fast about it.
Step 31 : Now click on Bevel and Emboss. I am not changing any of the default values.
Step 32 : Click again on the Blending Options. Drag the Fill slider to zero. Click OK in the Blending Options dialogue box.
Step 33 : Go to File>Save as. Save the File as PNG.
Step 34 : Click the Stop button to stop recording. Note that the last step in Action (highlighted in blue) is Save.
Step 35 : Go to File>Close All.
Step 36 : Go to File>Automate>Batch.
Step 37 : This dialogue box opens.
Step 38 : Before you do Step 35. Make two folders. I have made them in My Picture and named them Destination and Target. The Target folder should contain the images you wish to Watermark. The Destination folder is where the images will be put after being watermarked.
Step 39 : To carry on after Step 36. After you go to File>Automate>Batch, this dialogue opens. Click the Source and Click Choose. Then browse for the folder after the above dialogue box opens. Select the Target folder created earlier. The Target folder contains the images that I wish to watermark. You must remember one thing. All the images will have to be exactly of the same size. Click OK.
Step 40 : In the Destination, choose Folder from the drop down.
Step 41 : Tick the Override "Save As" Commands. Click OK when the other dialogue box pops up.
Step 42 : At the top the Action should be set to Watermark. Click OK. Photoshop then begins watermarking the images on its own.
Step 43 : Look in the Destination folder. I said earlier that I did not have photos of the same size. I had therefore made five copies of the same image.
There is the watermarked image. If you click the other images you will see that all have been watermarked.
Step 44 : I have opened a different free stock image in Photoshop.
Step 45 : I have again brought up the actions.
Step 46 : Click on Play Selection.
And, the watermark has been added to this image too. Since this image is not exactly the same size as the other, the watermark looks slightly different.