


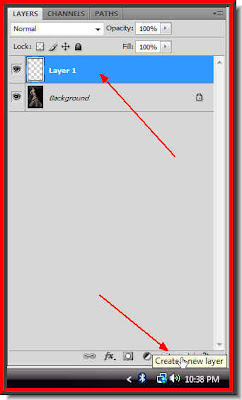
 Step 2 : On the Layer pallette click on the New Layer icon and a New Layer -- Layer 1 forms.
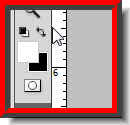 Step 3 : Now use the small bent arrow to change the Foreground and Background Color. The change will make White the Foreground Color and Black the Background Color.
Step 4 : Click on the Brush Tool. 
Step 5 : On the top panel you will find this icon on the right side. Click it to access the Brushes.
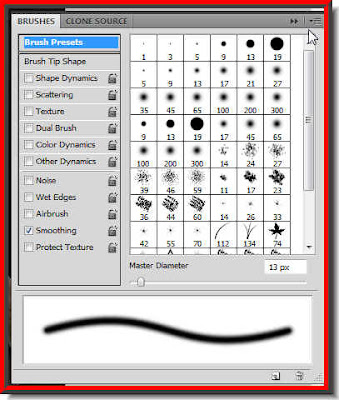 Step 6 : When you click the icon this dialogue box appears. Click where the small white arrow points to, to access the Brushes.
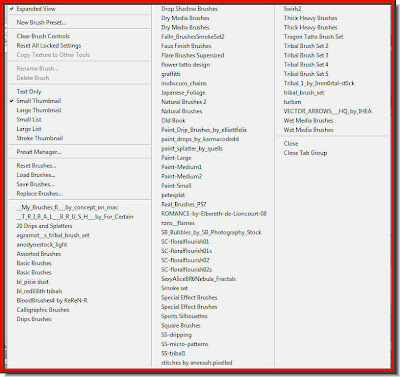 The Brushes pallette opens. I have a lot of extra Brushes that I have downloaded. That should not worry you.
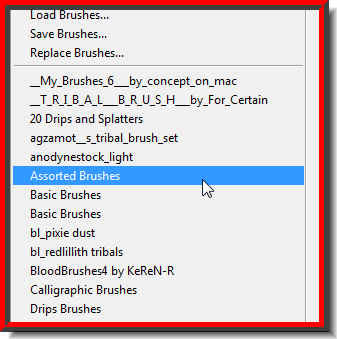 Step 7 : You will find Assorted Brushes in the list. It comes with all versions of Photoshop. Click on it.
Step 8 : This dialogue box pops up. Click ok.

Step 9 : In the Brushes pallette that opens, click on Brush 48. The small white hand shows what it looks like.
Step 10 : As soon as you click, look at the bottom panel. You will find how the Brush will look like. I will leave it at the default settings.

Step 11 : Click where the arrow points to in the left top panel and from the dropdown you will be able to set the size (master Diameter) and the Hardness. Here the Hardness is fixed, therefore you cannot alter it.

Step 12 : Remember you have set the Foreground Color to White in Step 3. Now draw something like this. Remember that you are on layer 1 (see Step2).
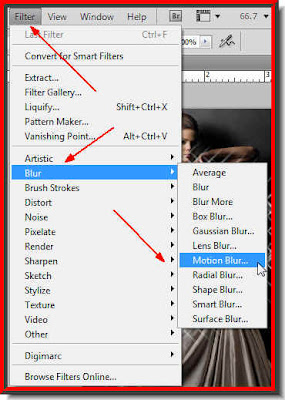 Step 13 : Go to Filter>Blur>Motion Blur.
Step 14 : In the dialogue box that pops up change the Angle to 45 and the Distance to 150 and click ok.

This is how the image looks after applying the Filter.

Step 15 : Go to Filter>Distort>Shear.
Step 16 : This dialogue box opens. You will find a straight line in the middle. Click where the arrows point to, to make the line bend, then click ok.
Step 17 : Now press Ctrl+F twice and the image looks like this. It is not necessary that you will get the same result, it may vary depending on your image and Brush size.

Step 18 : Click on the New Layer icon and another new layer -- Layer 2 forms.

Step 19 : Click on the Gradient Tool. Click in the top panel next to access the Gradient Editor.

Step 20 : The Gradient Editor opens. I have clicked on a Preset Gradient. You can click on any of the Presets.

Step 21 : Now with the Gradient drag up from bottom to top keeping the SHIFT key pressed. This enable you to drag upwards in a straight line.

Step 22 : The Gradient will completely cover your image. Look in the Layers pallette. You will find the Gradient in the top layer, above Layer 1. Now Press ALT and click between the edge of Layer2 and Layer 1. A small round spot will appear. The Layer will be clipped with the Layer below. As soon as it is clipped a small bent arrow will form on the left of the layer thumbnail. (See above).

This is how the image looks after the clipping takes place. You can stop here if you want to or continue with the additional steps.

Step 23 : Click on Layer 1.

Step 24 : Now press CTRL+J to duplicate Layer 1 twice. This is how the Layers panel looks.

And, this is how the image looks. That is all.
Other Photoshop tutorials are here.


