 Step 1 : I have opned this photo in Photoshop. It is a free stock image which I have also used before.
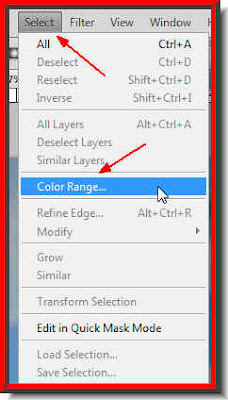 Step 2 : Go to Select>Color Range.
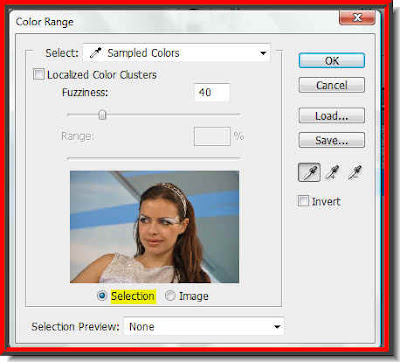 Step 3 : The Color Range dialogue box opens. By default Selection is selected. Leave it at that.
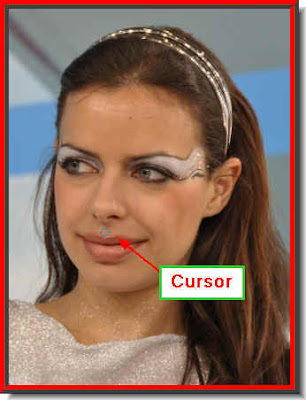 Step 4 : Drag your cursor over the image keeping the SHIFT key pressed. Look at the preview window.
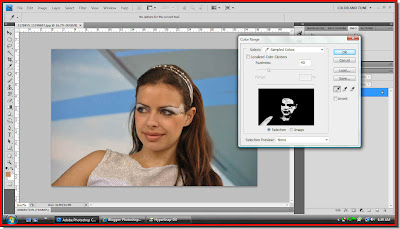 Step 5 : This is how the image looks in the preview window in the Color Range dialogue box. Drag till you are satisfied.
 Step 6 : Click ok in the Color Range dialgue box. You might see this dialogue if the image you are using is a high resolution one.
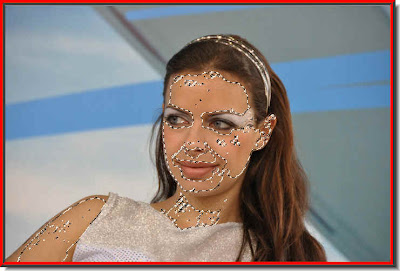
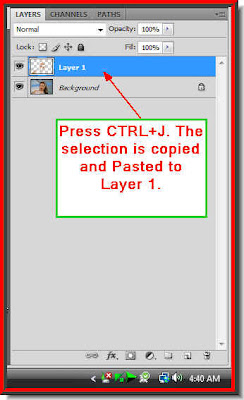
Step 8 : Press CTRL+J. The selection is copied and pasted into a new layer -- Layer 1.

Step 9 : Look at the Foereground Color. It has changed to the shade that the Color Range has picked up.
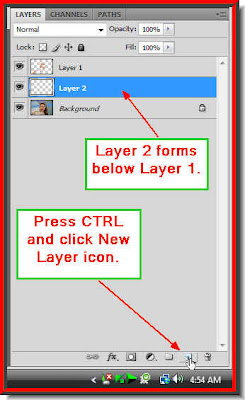
Step 10 : Now with Layer 1 active or it is the layer you are on press CTRL and click the New Layer icon. A new layer -- Layer 2 -- forms below Layer 1.
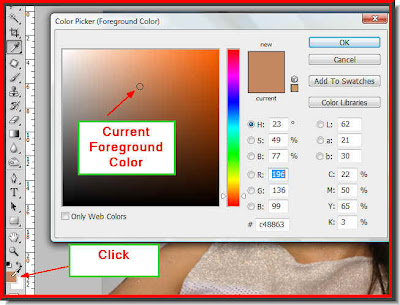
Step 11 : Now click on the Foreground Color. The Color Picker opens. Look at the panel at the right. The cursor points to the current Foreground Color.
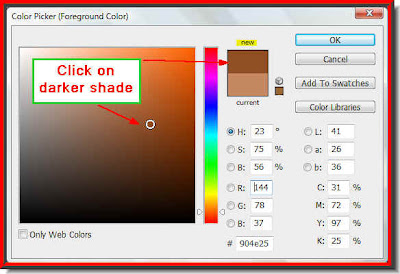
Step 12 : Now click on a darker shade. Notice that the 'New' at the top changes to the color you pick i.e. the new Foreground Color.
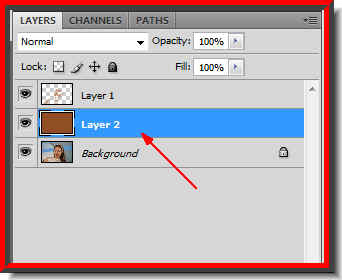
Step 13 : Press ALT+Backspace. Layer 2 fills with the Foreground Color picked.
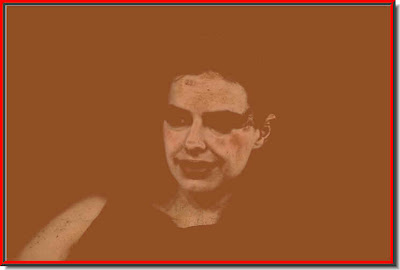
This is how the image looks. This is basically how this effect is done.
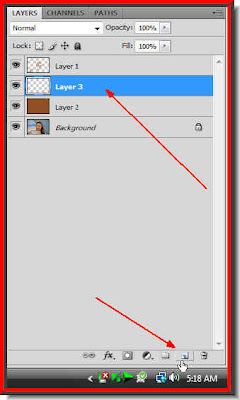


You can add Text. That is all.
Other Photoshop tutorials are here.


