


Michael Jackson had a fascination for lightening his skin. Some of us have it too. How do you change a dark skin to light? In photoshop of course. You should be able to do it in any version of photoshop. I have added a few steps more after Step 19 to tweak then image further. This is in no way a racial. It is a tutorial to demonstrate the limits to which Photoshop can be used.

Step 1 : I have opened this free stock photo in Photoshop. You can download it here
It belongs to =Tigg-stock. Now that we have our photo we can begin.

Step 2 : Press CTRL+J to duplicated the Background layer.

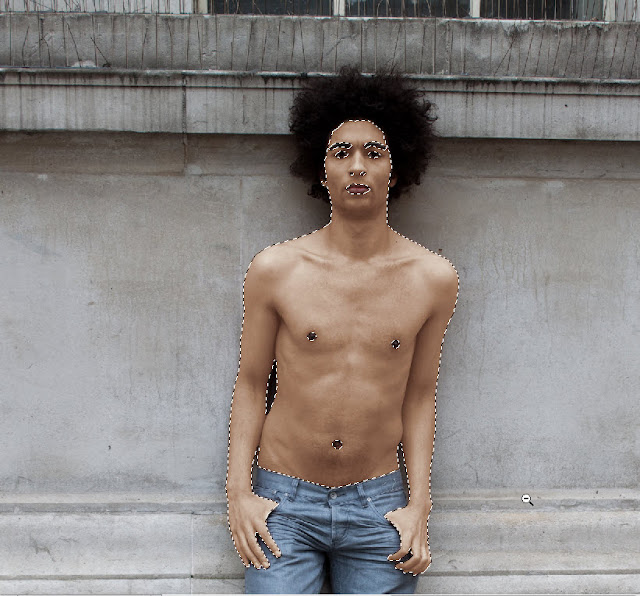
Step 3 : Next you will have to select the skin area. You can use this tutorial to select skin. I have used the Pen Tool after zooming into the image. It gives the most accurate selection. See here too .

Step 4 : I have left out the eyes, nostrils, lips etc outside the selection, which means it will not be affected in the following steps.

Step 5 : With the selection in place press CTRL+J. The selection is copied and pasted onto Layer 2.

Step 6 : CTRL+CLICK layer thumbnail of Layer2.

Step 7 : The marching ants reappear.

Step 8 : Press CTRL+SHIFT+U. The skin becomes saturated.

Step 9 : Click the New Fill or Adjustment Layer button and click on Levels.

Step 10 : In the Levels dialogue box drag the White slider to the bottom of the graph and push the Gray slider in the middle towards the left. The image will brighten.

Step 11 : This is how the image looks.

Step 12 : Click the Layer Mask thumbnail.

Step 13 : The marching ants reappear.

Step 14 : Click the Add Fill or Adjustment Layer button and click on Hue/Saturation.

Step 15 : The Hue/Saturation dialogue box opens. Tick Colorize.

Step 16 : This is how the image looks.

Step 17 : Drag the Hue slider gently towards the right. The skin color will change.

Step 18 : I have next dragged the Saturation and the Lightness sliders gently. Experiment by dragging to left and right very slowly till you are satisfied with the result.

Step 19 : And, here is how my image looks like.
I am adding the following steps
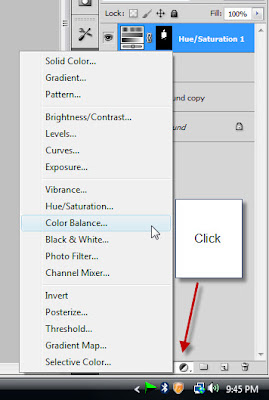
Step 20 : Again click on the New Fill or Adjustment button and click on Color Balance.
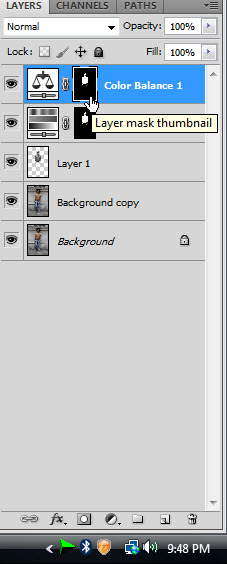
Step 21 : CTRL+CLICK on the Layer mask on Color Balance Layer.
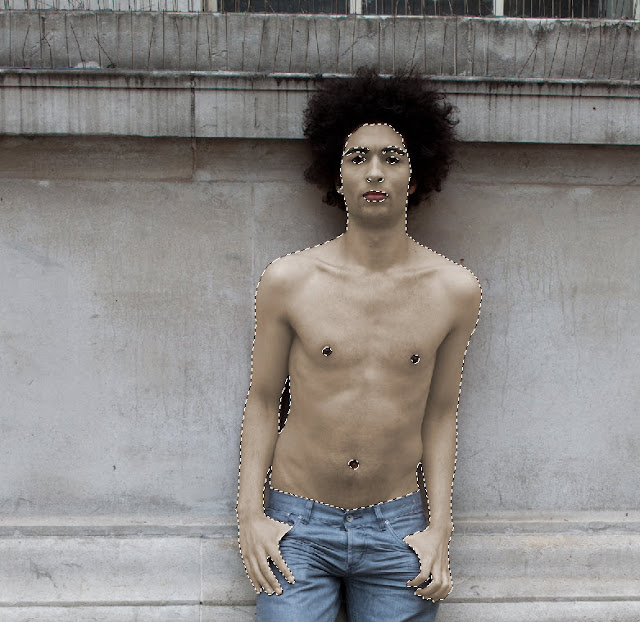
Step 22 : The marching ants reappear.
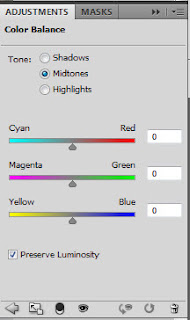
Step 23 : The Color Balance dialogue box opens. Note that the Tone is set to Midtones.
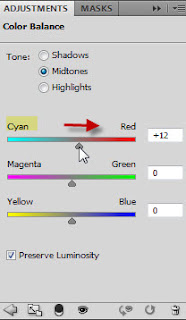
Step 24 : I have dragged the Cyan slider a bit towards the Red.
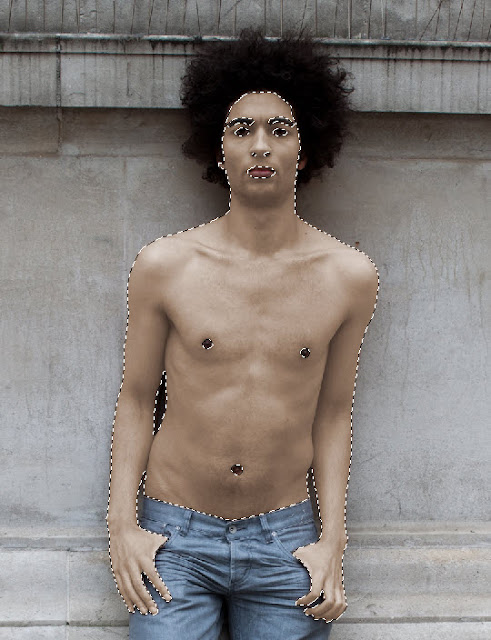
Step 25 : This is how the image looks.
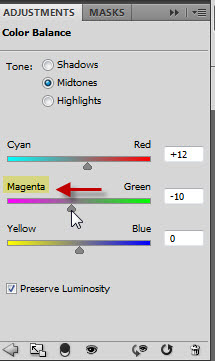
Step 26 : I have now dragged the Magenta slider towards the left. Just a little.
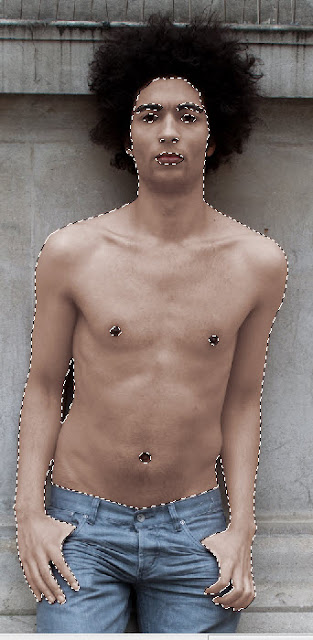
Step 27 : This is how the image looks.
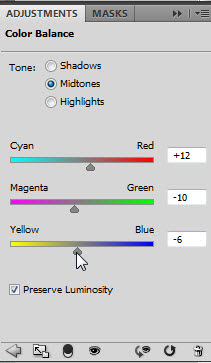
Step 28 : I have now dragged the last slider a fraction towards Yellow.

Step 29 : I have now clicked on the Highlights. Note all sliders, as earlier are set to 0.
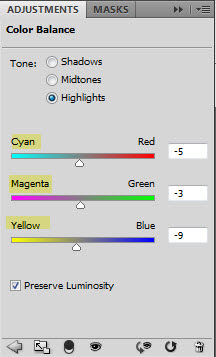
Step 30 : I have given little tweaks to the Cyan, Magenta and Yellow sliders. These settings will vary from image to image. I am just showing how to go about it.
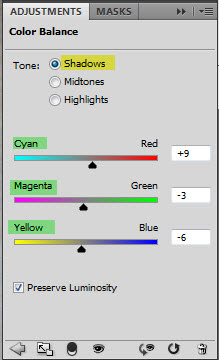
Step 31 : I have clicked on Shadows and tweaked the three sliders.
This is how my image looks.

Step 32 : Click on the Add Fill or Adjustment layer again and click on Brightness/Contrast.
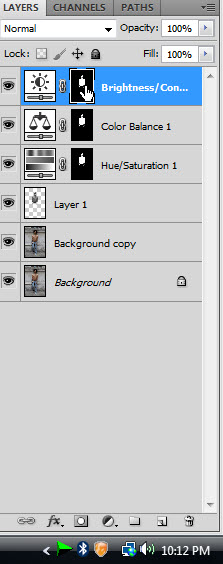
Step 33 : CTRL+CLICK on the Layer Mask thumbnail on Brightness/Contrast Layer.
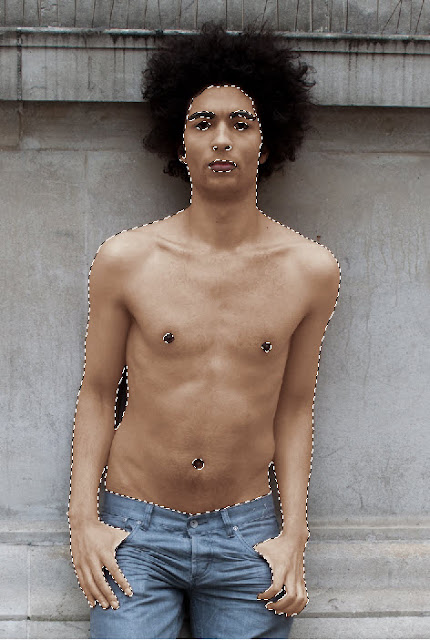
Step 34 : The marching ants reappear.
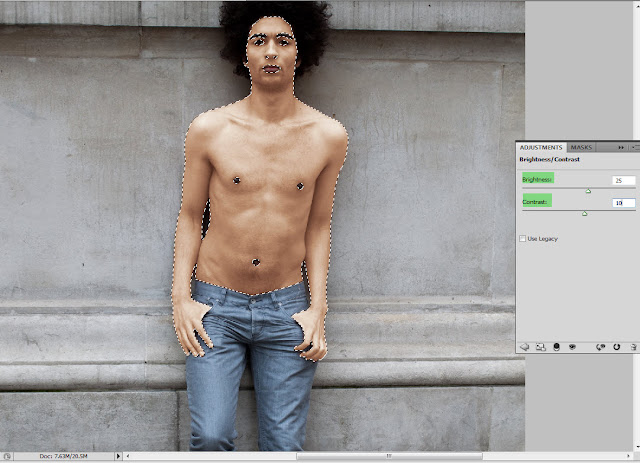
Step 35 : Now drag the Brightness and Contrast sliders slightly. You can notice the difference in the image as you drag the sliders.
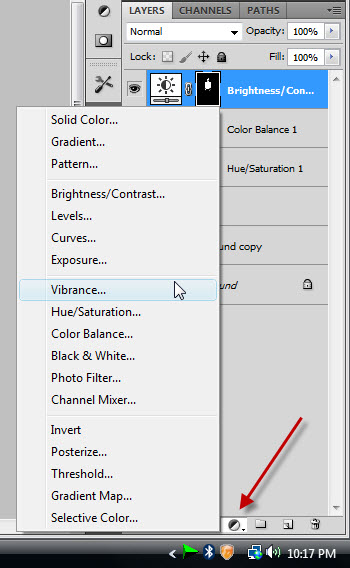
Step 36 : Click on the Add Fill or Adjustment button and click on Vibrance. This, however is only available in Photoshop CS 4 and 5. If you don't have it, use the Hue/Saturation It should do the job as well.
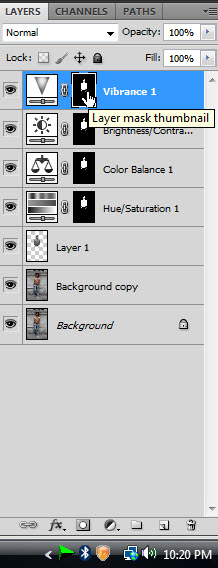
Step 37 : CTRL+CLICK on the Layer Mask on Vibrance layer. The marching ants will reappear.
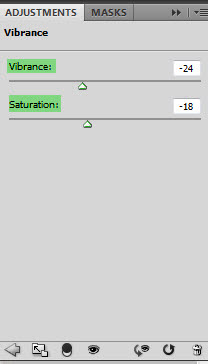
Step 38 : Now drag then Saturation slider first. Pull it gently towards the right or left till you are satisfied.
Next drag the Vibrance slider similarly till you are satisfied.
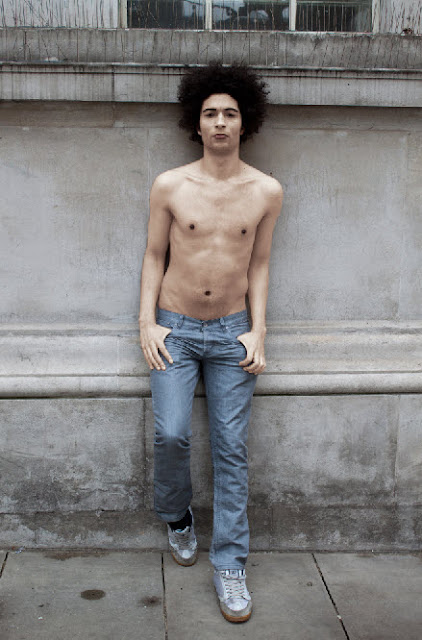
Step 39 : Press CTRL+D to deselect. This is my finished image.
You will not find it difficult.
I am adding the following steps

Step 20 : Again click on the New Fill or Adjustment button and click on Color Balance.

Step 21 : CTRL+CLICK on the Layer mask on Color Balance Layer.

Step 22 : The marching ants reappear.

Step 23 : The Color Balance dialogue box opens. Note that the Tone is set to Midtones.

Step 24 : I have dragged the Cyan slider a bit towards the Red.

Step 25 : This is how the image looks.

Step 26 : I have now dragged the Magenta slider towards the left. Just a little.

Step 27 : This is how the image looks.

Step 28 : I have now dragged the last slider a fraction towards Yellow.

Step 29 : I have now clicked on the Highlights. Note all sliders, as earlier are set to 0.

Step 30 : I have given little tweaks to the Cyan, Magenta and Yellow sliders. These settings will vary from image to image. I am just showing how to go about it.

Step 31 : I have clicked on Shadows and tweaked the three sliders.

This is how my image looks.

Step 32 : Click on the Add Fill or Adjustment layer again and click on Brightness/Contrast.

Step 33 : CTRL+CLICK on the Layer Mask thumbnail on Brightness/Contrast Layer.

Step 34 : The marching ants reappear.

Step 35 : Now drag the Brightness and Contrast sliders slightly. You can notice the difference in the image as you drag the sliders.

Step 36 : Click on the Add Fill or Adjustment button and click on Vibrance. This, however is only available in Photoshop CS 4 and 5. If you don't have it, use the Hue/Saturation It should do the job as well.

Step 37 : CTRL+CLICK on the Layer Mask on Vibrance layer. The marching ants will reappear.

Step 38 : Now drag then Saturation slider first. Pull it gently towards the right or left till you are satisfied.
Next drag the Vibrance slider similarly till you are satisfied.

Step 39 : Press CTRL+D to deselect. This is my finished image.
You will not find it difficult.
Other photoshop tutorials are here


