


 Step 1 : Open a New WhiteLayer in Photoshop. I have opened a new white document.
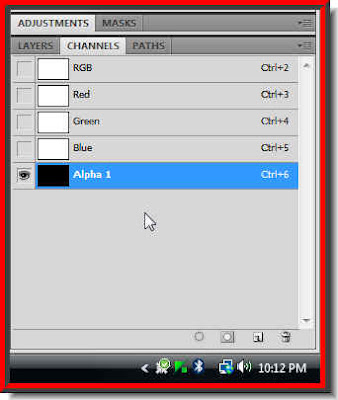
 Step 6 : Go to Filter>Pixelate>Color Halftone
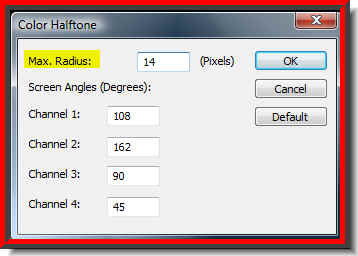 Step 7 : The Color Halftone dialogue box opens. I have just changed the Max Radius to 14. Click ok.
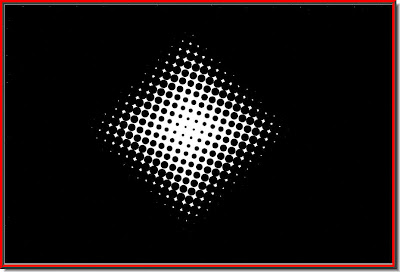 This is the effect I have got.
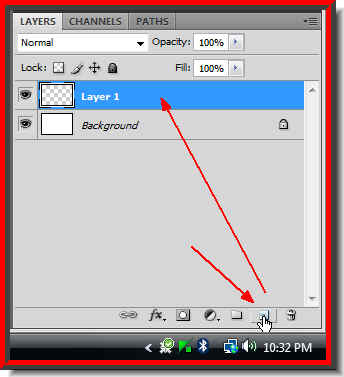 Step 8 : Click back on the layers pallette and click the New Layers icon. A new Layer 1 forms.
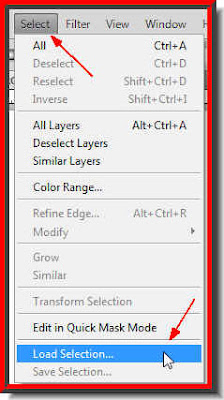 Step 9 : Go to Select>Load Selection.
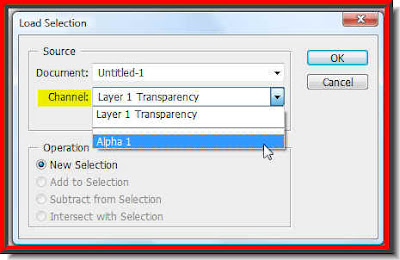 Step 10 : The Load selection dialogue box opens. Change the Channel to Alpha1 from the dropdown. Click ok.
 A selection of marching ants covers the white layer as above.
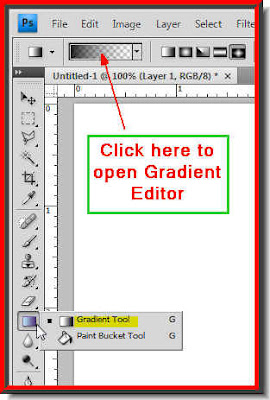 Step 11 : Click the Gradient Tool and the Gradient Editor in the top panel.
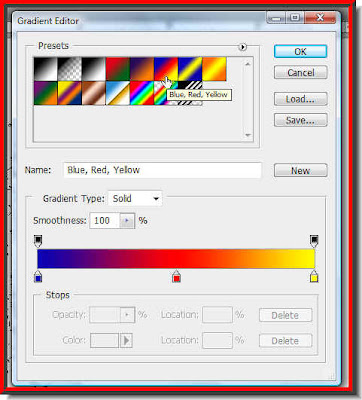 Step 12 : I have clicked on the third Preset from the right.
Step 13 : Change the Gradient Type to Noise.

Note the change in the horizontal bar at the bottom. Click ok.

Step 14 : Drag with the Gradient Tool from the middle of the marching ants to near the top as shown.

Step 15 : Press CTRL+D. This is how the image looks like.
 Step 16 : Click on the background Layer
 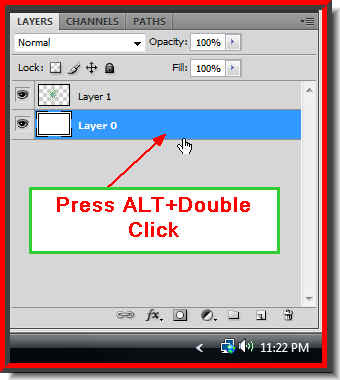 Step 17 : Press ALT and double click the Background layer. It will change to Layer 0.
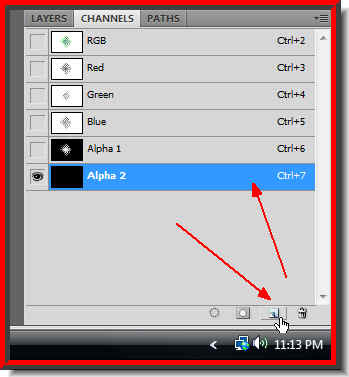 Step 18 : Go to the Channels pallete and click on the New Channel button. A new Alpha2 channel forms.
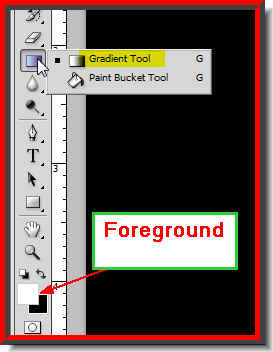
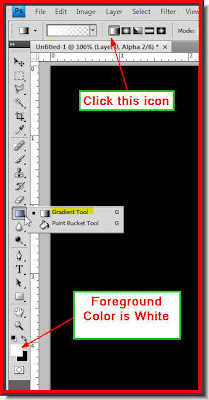 Step : 19 :Set the Foreground to White, then Click the Gradient Tool. In the top panel click the icon gradient shown.
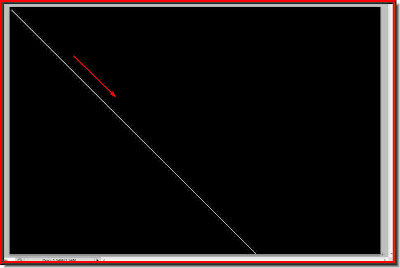 Step 20 : Draw diagonally with the Gradient Tool from top left to right bottom.
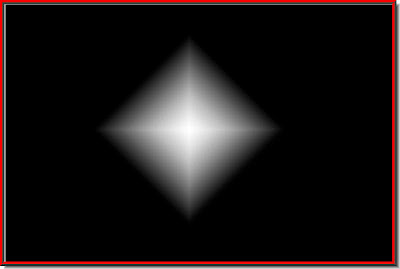
 This is how the image looks.
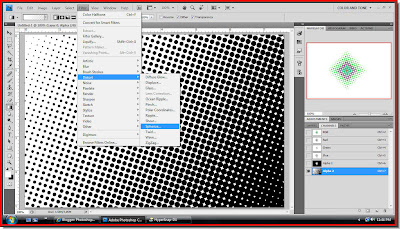
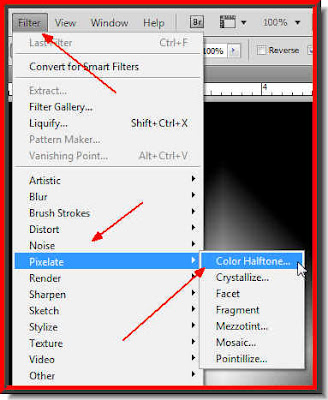 Step 21 : Go to Filter>Pixelate>Color halftone.
 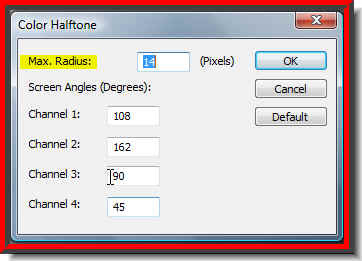 Step 22 : The Halftone dialogue box opens. The earlier Radius of 14 pixels is shown. Click ok.
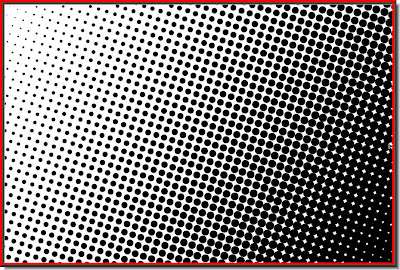
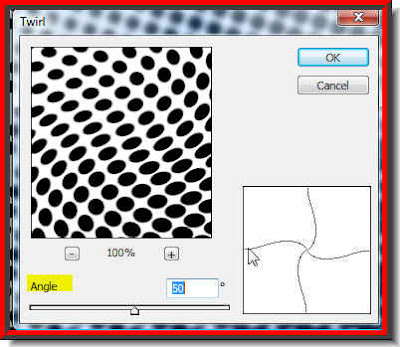 Step 24 : The Twirl dialogue box opens. I have dragged the Angle slider 50. Click ok.
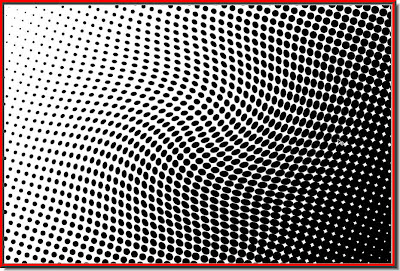 This is how the image looks with Twirl applied.
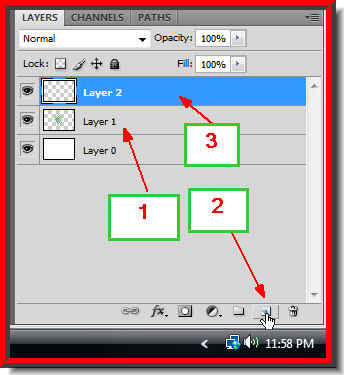
Step 25 : Click back on the Layers pallette. Remember you were working on Layer 0. Click on Layer1. Then click the new layer icon. A new layer -- Layer 2 will form on the top.

Step 26 : go to Select>Load Selection.

Step 27 : The Load Selection dialogue box opens.Change the Channel to Alpha 2 from the drop down. Click ok.

Step 28 : As soon as you click ok a column of marching ants fill the image.

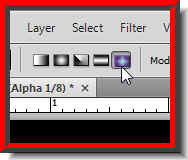
Step 29 : Now bring up the Gradient Editor by clicking on where the arrow pints to in the top panel.

Step 30 : As soon as click, the Gradient Editor opens. I have clicked on the third Preset from the right.

Step 31 : Change the Gradient Type to Noise and check the Restrict Color and click on the Randomize button. The color changes in the horizontal bar as you click.

Step 32 : On the top bar click the second Gradient. It is called Radial Gradient. If you hover your cursor over the five types of Gradients, you can read their names.

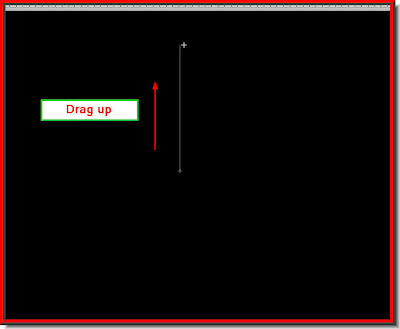
Step 33 : Now place you cursor or the Gradient Tool in the middle of the image and drag towards the top.

Step 34 : The Gradient has been applied. Press CTRL+D to deselect.
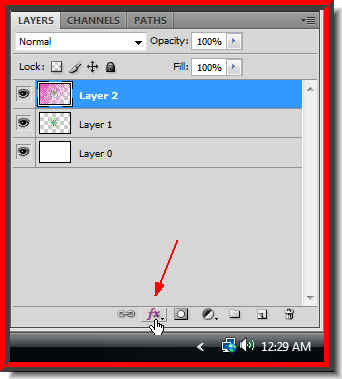 Step 35 : Click on the Add Layer Style button.
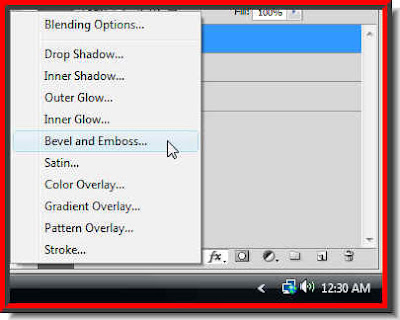 Step 36 : From the popup click on Bevel and Emboss.
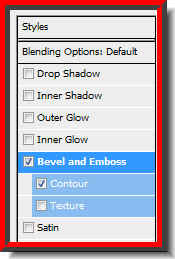 Step 37 : In the Bevel and Emboss dialogue box on the left panel click on Contour below Bevel and Enboss.
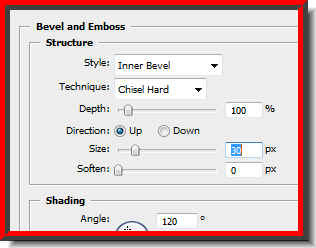 Step 38 : In the controls set the Technique to Chisel Hard, drag the Size and Depth sliders suitably. I have given certain settings. click ok
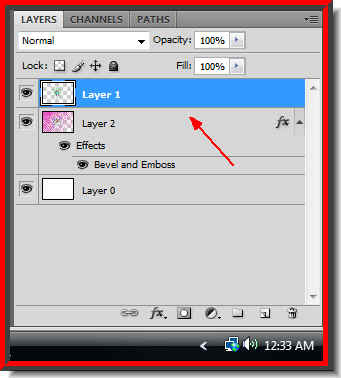
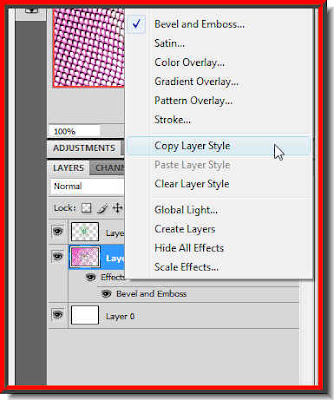 Step : 41 : Right click layer 2 and click on Copy Layer Style.
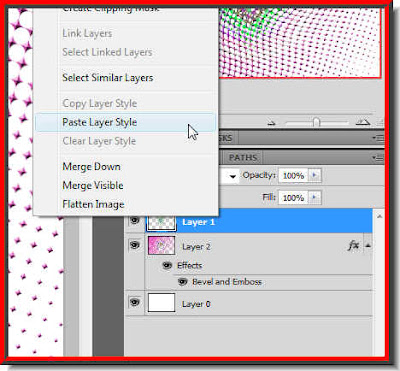 Step 42 : Go to Layer 1. Right click and click on Paste Layer Style. The Layer Style will be applied to Layer 1.
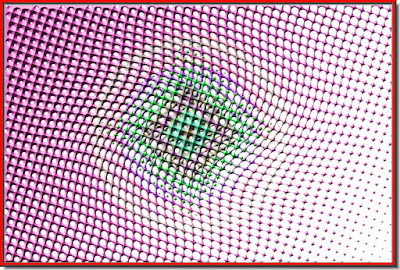 This is the effect I have got.
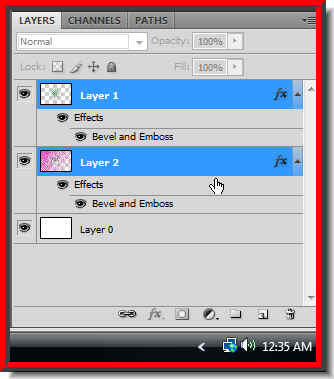 Step 43 : Click Layer 1. Press Shift and click on Layer 2. Both Layers will be highlighted. Press CTRL+E. Both Layers will merge into one.
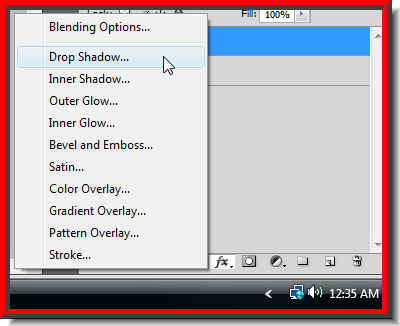
Step 44 : Click on Add Layer Style button again. Click on Drop Shadow.

Step 45 : In the Drop Shadow dialogue box change the Size and Distance sliders to 8 and reduce the Opacity to 50.

And this is my finished image, You can use it as a Background for an image or add text. That is up to you.
Other Photoshop tutorials are here.


