


You can create thick 3D Text in Photoshop. Any version. For a poster. I will use a number of photos which can be downloaded from http://sxc.hu/ First let us create the Text. It is simple enough.
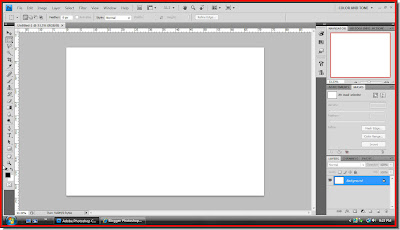 Step 1 : Open a new White Layer in Photoshop.
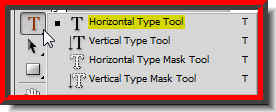 Step 2 : Click on the Type Tool and then the Horizontal Type Tool.
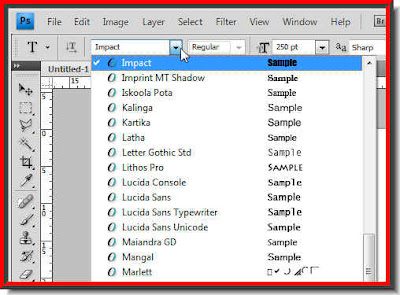 Step 3 : When you click the Type Tool. Look at the top bar. You can choose fonts by clicking where the arrow points to. It will reveal a dropdown of fonts available in Photoshop. Choose Impact. It is available in all versions.
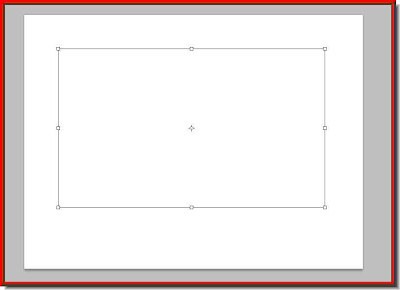 Step 4 : Draw out the Type box.
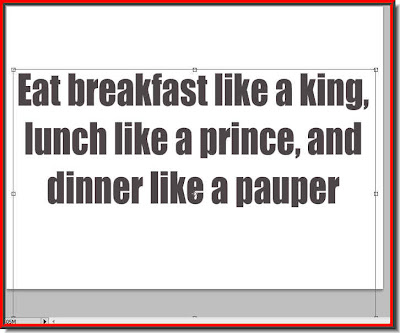
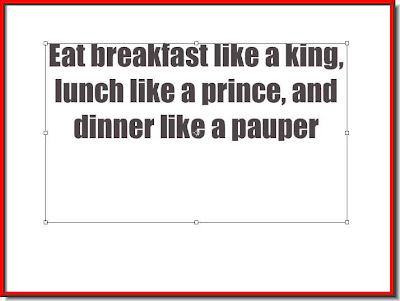 Step 5 : Type in your Text. I have typed in mine. It is a quotation.
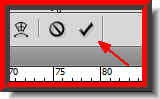
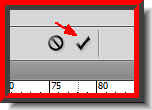 Step 6 : Click on the Tick mark in the top bar. The selection disappears and only the Text remains.
 Step 7 : Press CTRL+T.
 Step 8 : Click the right bottom corner and drag. The size of the Text will increase.
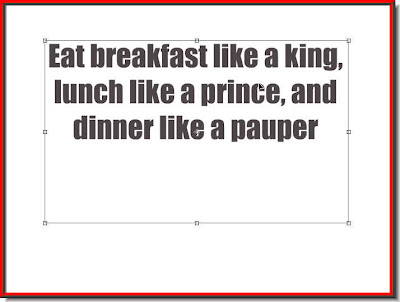
 Step 9 : The size of the Text has increased proportionately.
 Step 10 : Click onthe Tick mark on the top panel. This will apply the transformation.
Step 1 : Open a new White Layer in Photoshop.Step 2 : Click on the Type Tool and then the Horizontal Type Tool.Step 3 : When you click the Type Tool. Look at the top bar. You can choose fonts by clicking where the arrow points to. It will reveal a dropdown of fonts available in Photoshop. Choose Impact. It is available in all versions.Step 4 : Draw out the Type box.Step 5 : Type in your Text. I have typed in mine. It is a quotation.Step 6 : Click on the Tick mark in the top bar. The selection disappears and only the Text remains.Step 7 : Press CTRL+T.Step 8 : Click the right bottom corner and drag. The size of the Text will increase.Step 9 : The size of the Text has increased proportionately. Step 10 : Click onthe Tick mark on the top panel. This will apply the transformation. 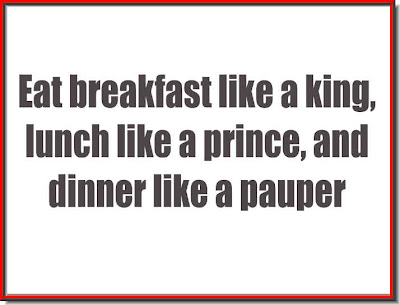
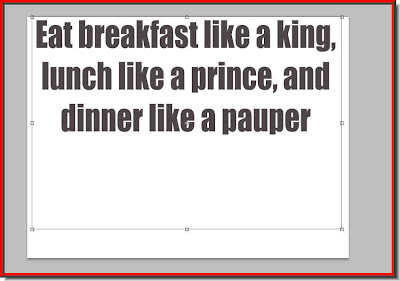
Step 11 : Dragthe Text roughly to the middle. You don't have to be exact. This is how the Text looks like.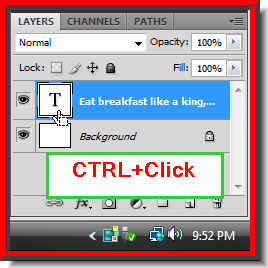
Step 12 : Look in the Layers pallette. Note that the Text layer is above the Background Layer. A Text layer is always on its own layer. Now CTRL+Click the Layer thumbnail.

Step 13 : The entire Text will be selected by marching ants.
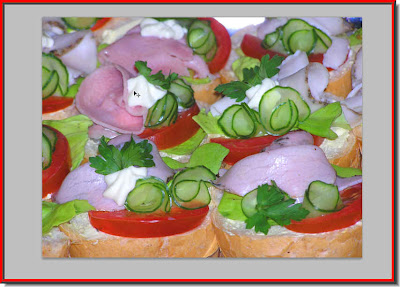
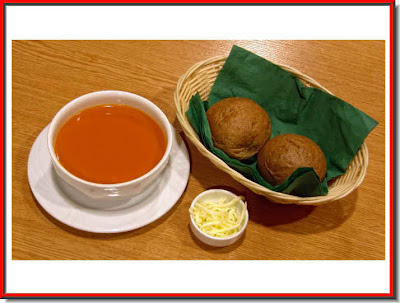
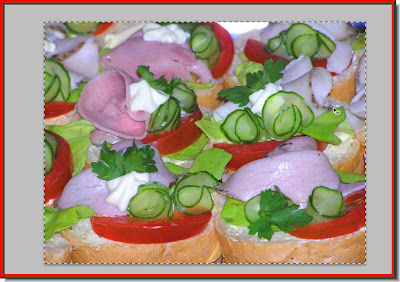 Step 14 : I have opened this image in Photoshop. You can download it here. Press CTRL+A (Select All) and then CTRL+C (Copy)
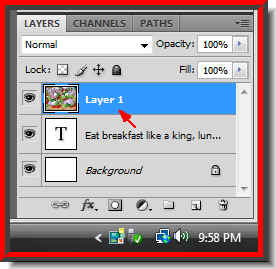
Look in the Layers pallette. You will find the image sitting on the topmost layer.
Step 15 : Go the image with the Text and press CTRL+V. The photo will be pasted on top of it. Here the image is hiding the Text.
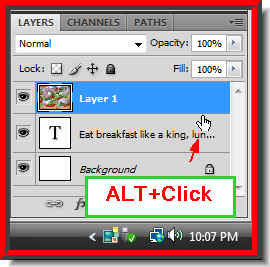 Step 16 : Place the cursor between the Text Layer and Layer 1. Press ALT+Click. A small black circle will apear as you click between the two layers.
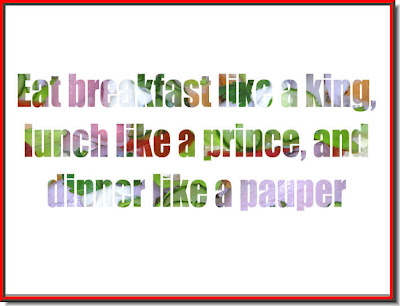 Look what happens. The Text layer has clipped the image in Layer 1.
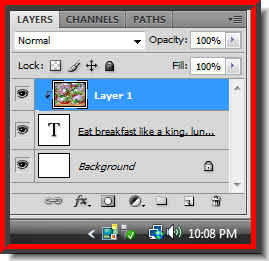 Look in the Layers pallette. Note a small bent arrow near the layer thumbnail. This means that the layer has been clipped.
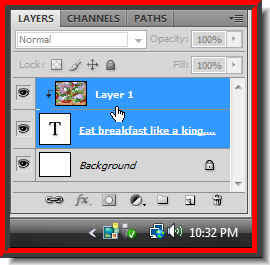 Step 17 : Note that Layer 1 is highlighted. Press Shift and click on the Text layer. Now both Layers will be highlighted.
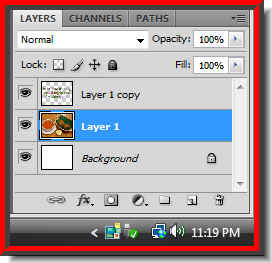
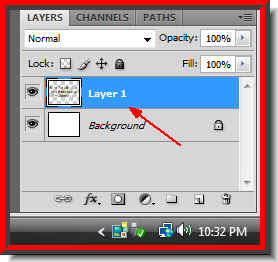 Step 18 : With both layers highlighted, press CTRL+E. The Text layer and the image layer becomes one layer -- Layer 1.
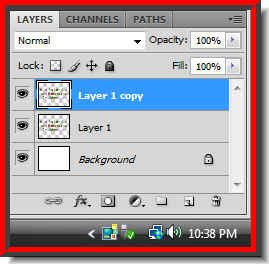 Step 19 : Press CTRL+J. Layer 1 duplicates into Layer 1 copy. Note that it is highlighted, which means it is selected.
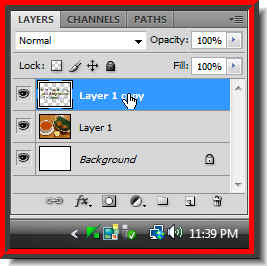
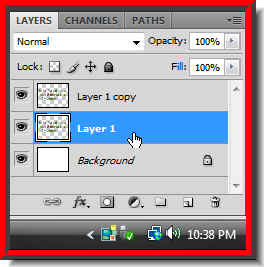 Step 20 : Now click on Layer 1. It becomes highlighted. It means we are now on this layer.
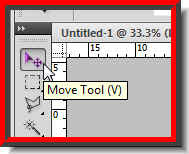 Step 21 : Click the Move Tool
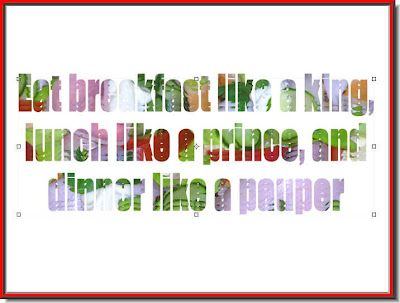 Step 22 : Now use the Down Arrow key to move the Layer down. Quite possibly you are having difficulty in seeing Layer 1.
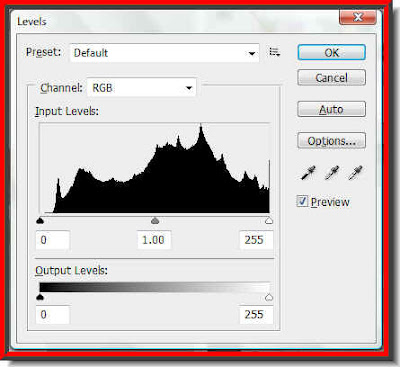 Step 23 : Press CTRL+L. The Levels dialogue box pops up.
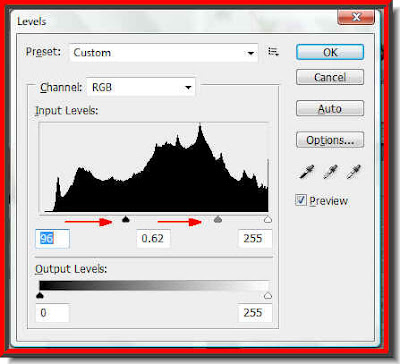 Step 24 : You will find the Black slider at the extreme left, the Grey slider in the middle and the White slider at the right. Drag the Black slider. I cannot give a hard and fast rule. It will depend on your image. I have dragged the Black slider almost to the middle, but not quite. I have dragged the Grey slider towards the right. Whatever you do on Levels will be visible on your image.
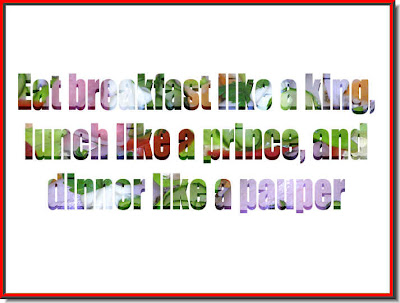 You can make out the 3D effect.
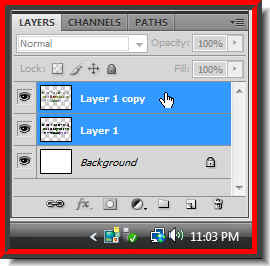 Step 25 : Click on Layer 1 copy. So long we were on Layer 1. Both Layers are highlighted. Press CTRL+E.
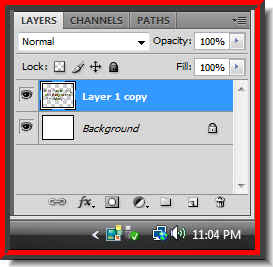 Layer 1 is merged with Layer 1 copy forming a single layer.
Step 26 : I have now opened this photo. You can download it here. Press CTRL+A, then CTR+C.
Step 27 : Go to the image we are making and press CTRL+V. The photo has been pasted. But note it does not cover the entire White Layer.
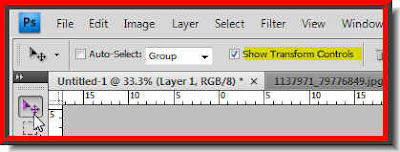
Step 28 : Click the Move Toool. Make sure that Show Transform Controls or Bounding box (in PS7) is checked.
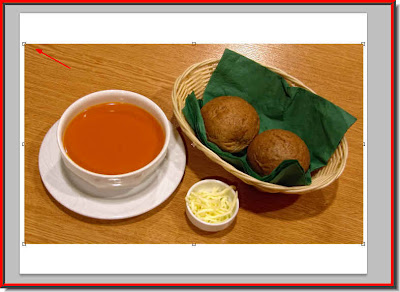
Step 29 : You will notice corner handles appear at the edge of the image.
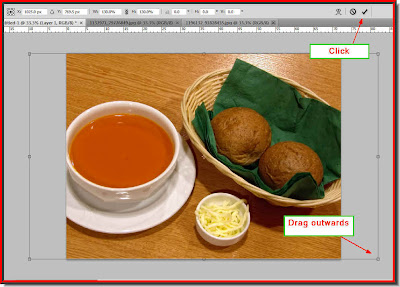
Step 30 : : Drag the bottom right corner outward. The image will increase proportionately till it covers the Text image. Now click the Tick Mark in the top panel.
Step 31 : Press CTRL+SHIFT+[. The image immediately goes behind the Text layer.
Step 32 : : This is how the Layers pallete looks like. Image 1 is the background of the Text layer. The White background layer is below Layer 1.
 Step 33 : : Click on Layer 1 copy. This is the Layer that contains the Text.
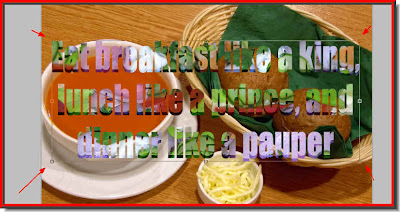 Step 34 : Click the Move Tool. An outline forms around the Text. Note the corner handles.
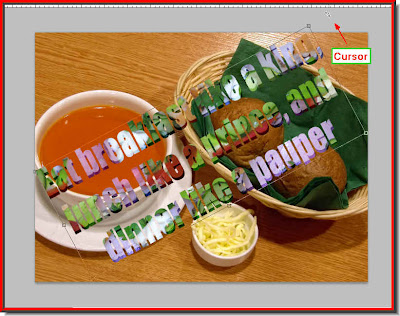 Step 35 : Hover the cursor near the top right corner. A small bent arrow appears. You will be able to rotate the Text with it. I have made the text diagonal.
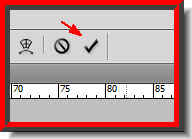
Step 36 : Click the Tick mark.

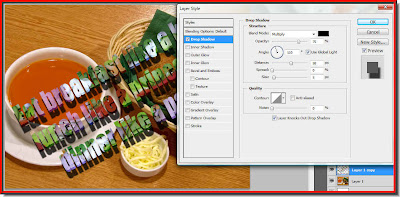
Step 37 : Click on the Add Layer Style button.
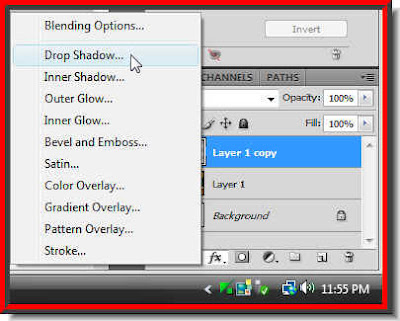
Step 38 : From the popup click on Drop Shadow.
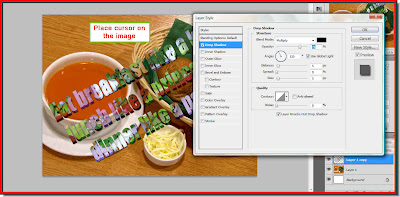
Step 39 : With dialogue box open and without touching any of its controls place you cursor on the image at the left.
Step 40 : Now move the cursor anywhere in the image. The Drop Shadow will change position.
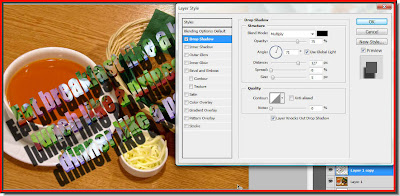
Step 41 : I have placed the Drop Shadow where I want it. It should follow the direction of light in the image below.
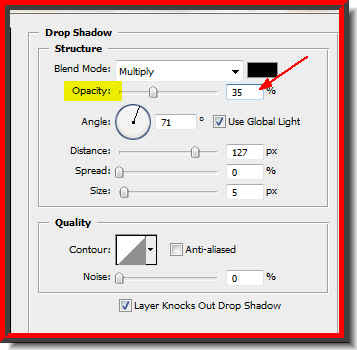
Step 42 : In the Layer Style dialgue box which is still open I have dragged the Opacity to 35 %. Do not click ok yet.
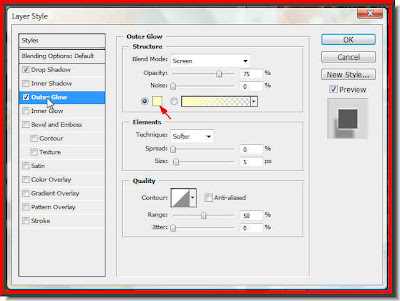
Step 43 : Now click on Outer Glow. The controls change to Outer Glow. Click where the red arrow points to.
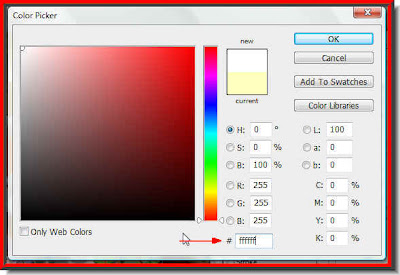
Step 44 : The Color Picker opens when you click. Type ffffff (6 fs) in the box at the bottom.
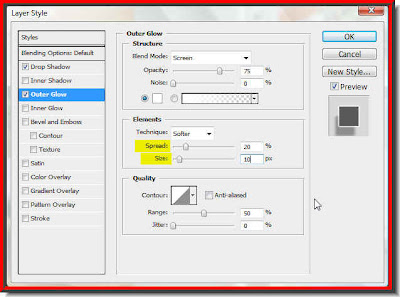
Step 45 : Note that the color has changed to White. Now drag the Spread then Size sliders suitably. How much will depend on the effect you want. Now click ok.
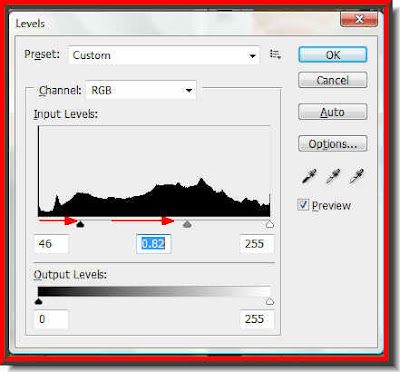
Step 46 : Press CTRL+L. The Levels dialogue box opens. Drag the Black slider first to darken the Text, then the Gray slider for reducing the highlights. Click ok.
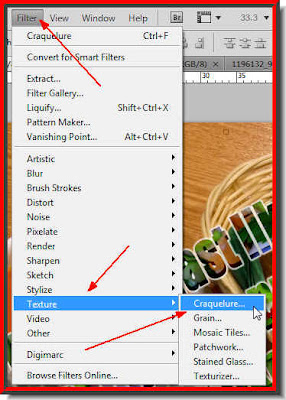
Step 47 : Go to Filter>Texture>Craquelure.
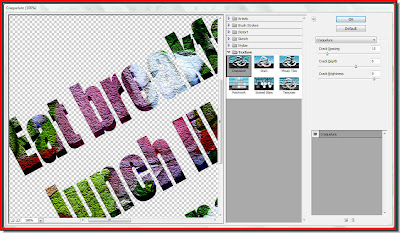
Step 48 : The Texture dialogue box opens. I am leaving the default settings and clicking ok.
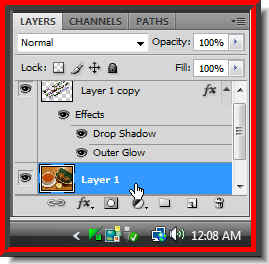
Step 49 : Now click on Layer 1.
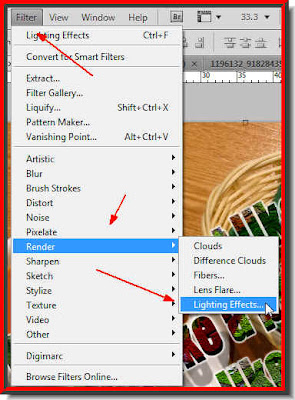
Step 50 : Click on FilterRender>Lighting effects.
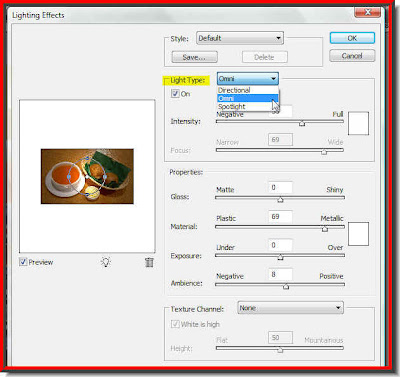
Step 51 : When the Lighting dialogue box opens, just change the Light Type to Omni and click ok.
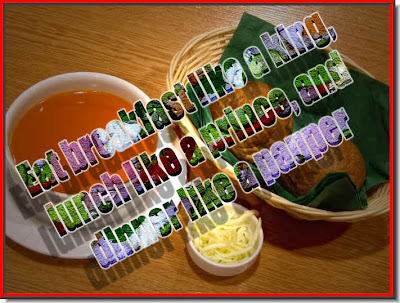
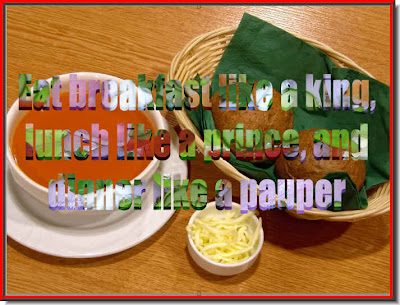
This is my finished image. I don't think it was difficult to follow. Try it out.
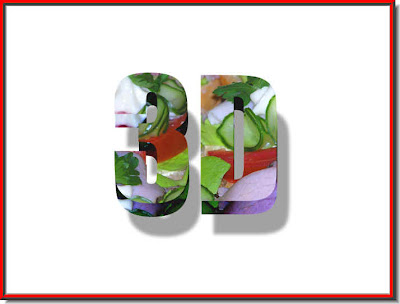
This is a larger size of Text created in the same way.
Other tutorials are here.


