


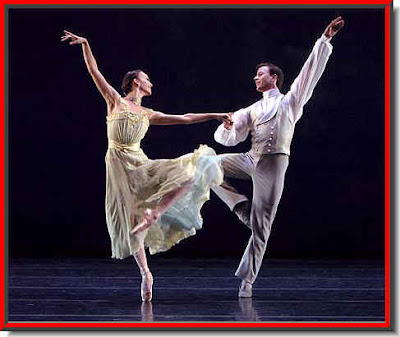
Step 1 : I have opened this photoshop to which I will give the Half Tone border.

Step 2 : Click on the Rectangular Marquee Tool.

Step 3 : Draw out a selection with the Rectangular Marquee Tool.

Step 4 : Go to Select>Inverse.

Note that selection has inversed. The outer side of the image has also been selected.

Step 5 : Click the Edit in Quick Mask Mode button. This is CS4. There is a single button, but in earlier versions you will find two buttons.

As soon as you click the inner selection will be filled with a Red color.

Step 6 : Go to Filter>Pixelate>Half Tone.

Step 7 : The Color Half Tone dialogue box opens. I am using a small, low resolution image. I am keeping the Maximum Radius at 12. If you use a higher resolution photo, you will have to increase the Max Radius. Click ok.

Step 8 : As soon as you click ok, you will notice the border having taken shape.

Step 9 : As I said I am using PS CS4. I am again clicking on the same button. In earlier versions click the other button. They are located side by side at the same place.

Step 10 : Press CTRL+D to deselect. And, there is your image with a Half Tone border. Try it out. It is simple enough.
Other Photoshop tutorials are here.


