From the last tutorial that I posted, I got an idea to post this tutorial which uses some of the ideas of the earlier one, but in a more easier way.
The last tutorial is here. We will be clipping layers in Photoshop. Let me show you how to go about it.
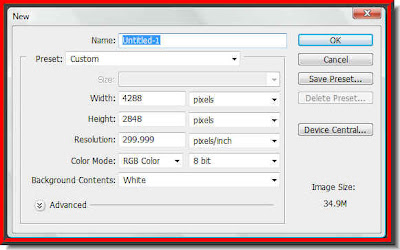
Step 1 : I have opened a New White Layer in Photoshop.
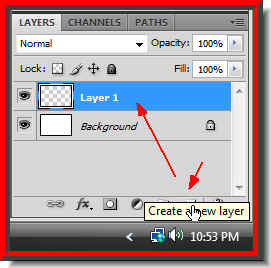
Step 2 : Click the New Layer icon and a new layer forms above the Background Layer which is the White Layer -- Layer 1.
Step 3 : Click the Elliptical Marquee Tool. I have shown where the Move Tool is also in case you did not know.
Step 4 : Press SHIFT and drag. You will be able to draw a perfect circle. Position it in the middle.
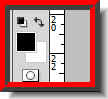
Step 5 : Make sure that the Foreground is set to Black and Background to White. If it is not so, press 'x' and then 'd' to set it to the default.
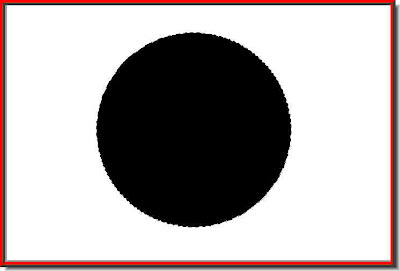
Step 6 : Now press ALT+BACKSPACE and the circle fills with Black. Press CTRL+D to deselect.
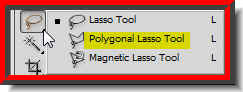
Step 7 : Click the Polygon Lasso Tool.
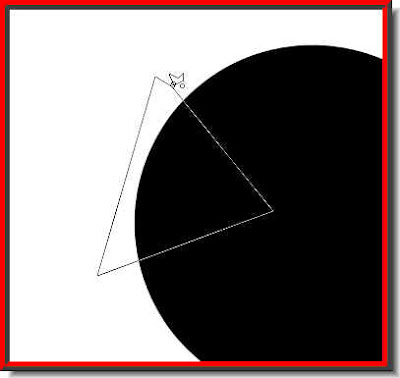
Step 8 : With the Polygon Lasso Tool draw a selection as above. When you come back to the point where you click first a small 'o' forms near the tool. This means that the path will be closed.
Step 9 : The path has been closed.
Step 10 : Use the Move Tool to move the segment away from the circle as shown above. Then press CTRL+D to deselect. This is one step you will have to repeat again and again to shatter the circle.
Step 11 : Draw another selection with the Polygon Lasso Tool and then follow the same steps above to move it away from the circle.
Step 12 : After you have moved the fragment away from the circle. Press CTRL+D.
Step 13 : Draw another selection with the Polygon Lasso Tool.
Step 14 : Draw the fragment away from the circle and press CTRL+D to deselect. We are just repeating the steps again and again to create the shattered effect.
Step 15 : The circle has been shattered.
Step 16 : I have now opened this photo is Photoshop.
Step 17 : Press CTRL+A (Select All) and then CTRL+C (Copy).
Step 18 : Go to the shattered circle image and press CTRL+V (Paste). The photo of the fishes will be pasted on the shattered circle.
Step 19 : Now click the Move Tool. make sure that Show Transform Controls are checked, It is called Bounding Box in PS7.
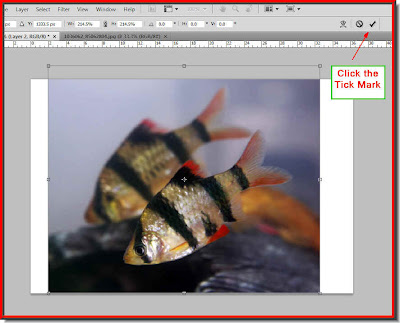
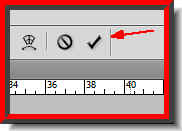
Step 20 : Press SHIFT+ALT and drag one of the corner handles. This will enable you to increase the size of the fish photo proportionately. After you finish dragging click the Tick Mark in the top right of the top panel.

Step 21 : Note that the photo of the fish is on the top layer. Now drag the opacity slider to be able to see beneath onto the shattered circle image.
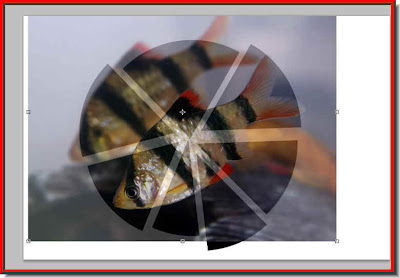
Step 22 : Now you can see the shattered circle below. Make any adjustments by dragging with the move tool to further resize so that the main portions like the eye are clearly visible in the fragments.
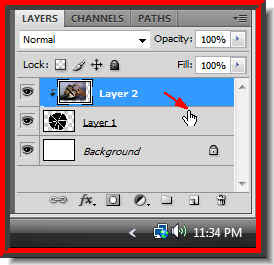
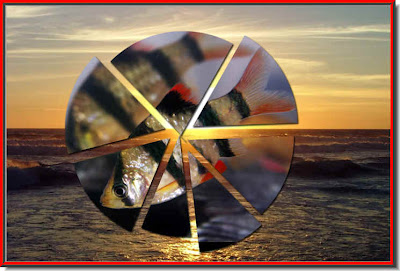
Step 23 : Drag the Opacity slider back to 100. Now place the cursor between Layer 2 and Layer , press ALT and click. A small black circle will appear. And, let us see what happens.
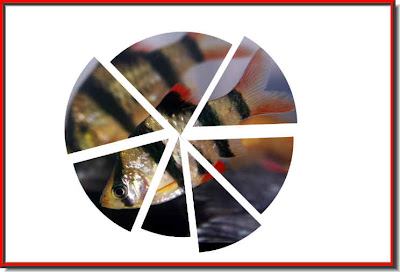
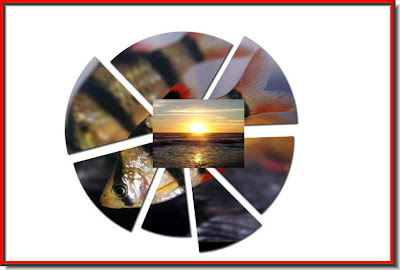
Step 24 : The fish image has fitted exactly on to the shattered circle.
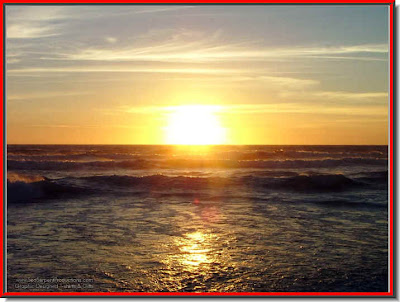
Step 25 : I have now opened this photo in Photoshop.
Step 26 : Press CTRL+A (Select All), then CTRL+C (Copy).
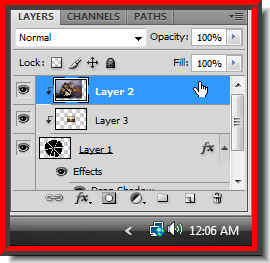
Step 27 : Cklick on Layer 2.
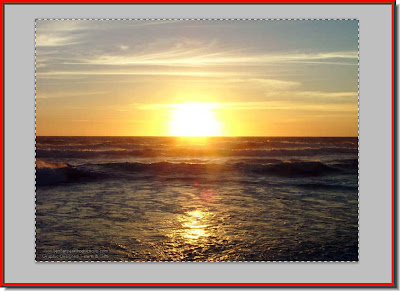
Step 28 : Now press CTRL+V (Paste). The sunset photo has been pasted on the fish photo.
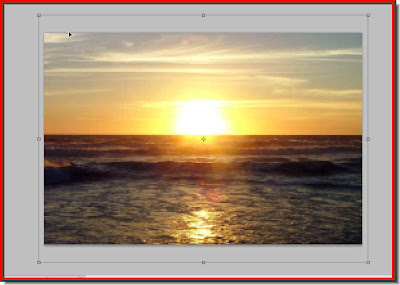
Step 29 : Now keeping SHIFT+ALT pressed drag a corner handle till the sunset image completely covers the images below.
Step 30 : Click the Tick mark in the top panel.
Step 31 : Finally press CTRL+SHIFT+[. This will send the image of the sunset behind the fish image. Give a drop shadow to the fish layer. That is all.
Other photoshop tutorials are here.


