Turning an image to mono or single color is quite easy and can be done in any version of Photoshop. First you need an image.
I will be using this free stock image. You will find it here.
It belongs to ~Katanaz-Stock
Step 1 : Click the Add New Fill or Adjustment Layer and click on Solid Color.
Step 2 : The Pick a Solid Color dialogue box opens. This is how photoshop looks. The image is covered in Black.
Step 3 : Click the Color Libraries.
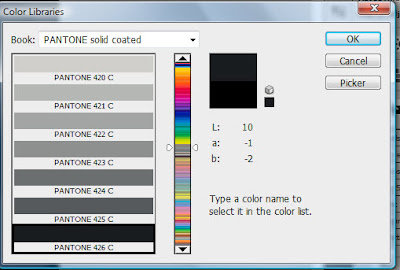
Step 4 : The Color Libraries open.
Step 5 : Click on any color in the spectrum, the column of color in the middle.
Step 6 : I have clicked on a Green. You can click on any Color you fancy.
Step 7 : I have clicked on Pantone 347 C. As soon you click the top half of the box at the top changes to the shade picked. Click OK.
Step 8 : This is how Photoshop looks.
Step 9 : Change the Blend Mode to Color.
This is how the image looks. That is basically how you change an image to mono color or single color.
You can experiment with the Blend Modes. I have changes it to Hue.
This is the effect with Hue as Blend Mode. Everything will depend on the image you use. The effects will vary.
You can also change it to Soft Light.
This is the effect with Soft Light. You can try other Blend Modes too depending on your image.
This is how the Layers pallet looks. I have changed the Blend Mode back to Hue.
Step 10 : Press SHIFT and click on the Background Layer. Both the Layers are highlighted.
Step 11 : Press CTRL+E. The two layers merge into one.
Step 12 : Press ALT and double click the Background Layer. It changes to Layer 0.
Step 13 : Press CTRL and Click the New Layer icon and and Layer 1 forms below Layer0.
Step 14 : The Foreground Color is set to the default Black and Background to White. If it is not click x and d on the keyboard.
Step 15 : Press CTRL+BACKSPACE to fill with the Background Color which is White. Layer 1 is filled with White.
Step 16 : Click on Layer 0.
Step 17 : Press CTRL+T. A selection forms around the image.
Step 18 : Press CTRL+SHIFT and drag the top left corner handle diagonally down. The image will decrease in size proportionately.
Step 19 : Hover the cursor on the top left corner handle. A small bent two headed arrow appears. You can use it to rotate the image in any direction.
Step 20 : You can also move the image in any direction with the cursor.
Step 21 : Click the Tick Mark in the top panel or press ENTER to apply the transformation.
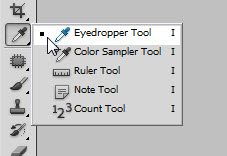
Step 22 : Click the Eyedropper Tool.
Step 23 : Click on a color in the image with the Color Picker.
Step 24 : As soon you click on a color with the Color Picker, the Foreground changes to the color picked. Click the Foreground Color.
Step 25 : When you click the Foreground Color The Color Picker (Foreground Color) comes up with the shade of Green selected indicated in the color box at left.
Step 26 : Click on another shade. The numerical value of the color is given at the bottom. Click OK.
Step 27 : Click on Layer 1.
Step 28 : Press ALT+BACKSPACE to fill Layer 1 with Foreground Color.
This is how the image looks.
Step 29 : Go to Filter>Render>Lighting Effects.
Step 30 : The Lighting Effect dialogue box opens.
Click OK.
The finished image.
Other photoshop tutorials are here


