


Making a round photo in Photoshop is quite simple. It works with any version and can be done in any version of photoshop. I will show you how to manipulate a drop shadow.

Step 1 : I will be using this photo of this vintage car. Any image will do. I have opened it in photoshop.

Step 2 : In the Layers palette, press ALT and double click the Background Layer. The background layer changes to Layer 0.

Step 3 : Click the Elliptical Marquee Tool.

Step 4 : Make sure that New Selection is selected. It is so by default.

Step 5 : Press SHIFT and you will be able to draw a perfect circle with the Elliptical Marquee.

Step 6 : Press CTRL+SHIFT+I. This will reverse the selection.

Step 7 : Press DELETE. The background outside the circle is deleted. Press CTRL+D to deselect.

Step 8 : Press CTRL+A (Select ALL). A selection will appear all around the image. Click the Move Tool.

Step 9 : In the top panel click the second icon at the top.

Step 10 : Then click the fifth icon. The two icons are Align vertical centers and Align horizontal centers.

Step 11 11 : The circle moves to the dead center. Press CTRL+D to deselect.

The Layers panel looks like this.

Step 12 : Click the Add Layer Style button. Click on Stroke from the popup.

Step 13 : The Stroke dialogue box opens. If you click on the Color, you can change the color of the stroke.

Step 14 : The Select Stroke Color dialogue box opens.

Step 15 : Move the cursor to any part of the image. Instead of trying to think which color will look good for the stroke, it is better to select a color from the image. Click the cursor when you want to select the color from any part of the image.

Step 16 : I have clicked on the bonnet of the car to select the Stroke Color. The Stroke Color is selected automatically in the Stroke dialogue box. Click OK.

Step 17 : Drag the slider of Size in the Stroke Layer Style dialogue box to determine the size you want the Stroke to be. Click OK.

This is how the image looks.

If you want to save with a transparent background press CTRL+SHIFT+S. This dialogue box will appear. Save as either as PNG or GIF.

Step 18 : If you do not want to save with transparent background do these steps. Press CTRL+CLICK NEW LAYER ICON.

Step 19 : A new Layer 1 forms below Layer 0.

Step 20 : Make sure that the Forfeground/Background color is set to the default Black/White. If not then press x and then d on the keyboard to restore the default.

Step 21 : Press CTRL+BACKSPACE. This will fill with the Background Color which is White.

Step 22 : Double click Layer 0 or just below it.

The Layer Styles dialogue box opens again.

Step 23 : Click on Drop Shadow.

Step 24 : With the Layer Style dialogue box open place the cursor on the image and you will be able to move the Drop Shadow as you wish.
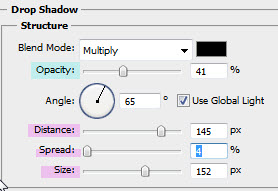
Step 25 : Now drag the size, then the size sliders. Also adjust the distance. Lastly lower the Opacity. There is nothing hard and fast about the values. They will depend on your image. Click OK when satisfied.

This is how the image looks.

Step 26 : Here are some additional steps if you wish. I will show you how to manipulate a Drop Shadow. Right click the Drop Shadow. From the popup click on Create Layers.

Step 27 : This dialogue box opens. Click OK.

Step 28 : A Layer 0's Drop Shadow forms. Click on the layer. The Layer above it is the Stroke Layer.

Step 29 : Press CTRL+T. A selection forms around the Drop Shadow.

Step 30 : Keeping CTRL+T pressed drag the middle top handle down and sideways. (You can drag it in any direction of course). Press ENTER.

This is how the image looks.

Step 31 : Now for another additional step if you want. Click on Layer 0. CTRL+CLICK the layer thumbnail.

Step 32 : A selection forms around the circle.

Step 33 : Go to Filter>Distort>Spherize.

Step 34 : This dialogue box comes up. Click OK. Press CTRL+D to deselect.

This is how my image looks.

Step 35 : Click on the Stroke Layer. Reduce the opacity of the layer to 50%.

This is how the finished image looks. That is all.
Other Photoshop tutorials are here


