


You know what rivets are. Create a rivet in Photoshop. Make a Brush with it. Apply it to Text. Give a 3D effect to the Text. It can all be done in all versions of Photoshop. I am dividing this tutorial into parts. Do them one at a time.
 I will create this Text.
Creating the Rivet
Creating the Rivet

Step 1 : Open a new document in Photoshop. I am using the Default Photoshop Size as Preset. I have named it Rivets. Click OK.

The blank white document opens.

Step 2 : Click the New layer icon. A new Layer 1 forms above the Background Layer. Now to make a rivet.
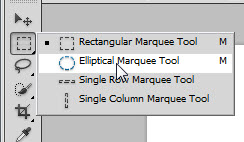
Step 3 : Click the Elliptical Marquee Tool.

Step 4 : Press SHIFT and you will be able to draw out a perfect circle.

Step 5 : Click the Gradient Tool, then click on Gradient Editor.

Step 6 : The Gradient Editor opens. Click on Black,White Preset. Click OK.

Step 7 : In the top panel click on Radial Gradient.

Step 8 : in The top panel check Reverse.

Step 9 : Click roughly in the middle of the circular selection, press SHIFT and drag to the circumference.

The circular selection is filled with the Gradient. It is a mite too dark.

Step 10 : I am reducing the Opacity of Layer 1 to 65%.

Step 11 : The image looks like this.

Step 12 : Click the New layer icon. A new Layer 2 forms.

Step 13 : Click the Rectangular Marquee Tool.

Step 14 :Draw out a thin selection with the Rectangular Marquee.

Step 15 : Click the Foreground Color.

Step 16 : The Color Picker opens. I have clicked on a shade of gray in the left panel. The numerical value of the color is 838080. If you want to use the same shade type in the value in the highlighted box at the bottom.
Click OK.

The Foreground Color changes to the color chosen.

Step 17: The selection is filled with the gray. Press CTRL+D to deselect.

Step 18 : Click the Layer Effects button. Click on Inner Shadow.

Step 19 : In the Inner Shadow I have dragged the Size slider to 8. Click OK.

The rivet is almost formed.

Step 20 : Click the New Layer icon. Layer 3 forms.

Step 21 : Click the Rectangular Marquee Tool.

Step 22 : Draw out a horizontal selection.

Step 23 : Press ALT+BACKSPACE. The selection is filled with the gray chosen earlier as Foreground Color.
Press CTRL+D to deselect.

Step 24 : Press ALT. Drag up the fx icon from Layer 2 to Layer 3.

The finished rivet.

Step 25 : With layer 3 highlighted, press SHIFT and click on Layer 1. All three layers are highlighted.

Step 26 : Go to Layer>Merge Layers or press CTRL+E.

Step 27 : The three layers have been merged into Layer 3. Now to make the Brush.
Making the Rivets Brush

Step 28 : Go to Edit>Define Bush.

Step 29 : This dialogue box pops up. I am naming the Brush Rivets. Click OK.

Step 30 : Click the Brush Tool.

Step 31 : Click in the top panel to reveal the Brushes. Scroll down. You will find the Rivets Brush at the bottom.
The Text

Step 32 : Open a new Document. Click the Horizontal Type Tool.

Step 33 : Click the Fonts. A drop down menu will show you the fonts available in your version of Photoshop. I have chosen Impact which is found in all versions. I have set the Font Size at 90. My new White document is the default Photoshop size.

You can set the Text Color from here. It is already selected.

Step 34 : Draw out the Text Box. There is a blinking cursor inside which indicates the size of the Text.

Step 35 : I have typed out my Text.

Step 36 : If the Text Box is larger than your Text, drag the corner handle in.

Step 37 : Click the Tick Mark in the top panel.

Step 38 : Press CTRL+T. A selection forms.

Step 39 : Drag corner handles to resize the Text.

Step 40 : Click the Tick mark in the top panel.

Step 41 : Right click the the Text layer. Click on Rasterize Text.

The Text has been rasterized.

Step 42 : Press CTRL+J. Rivets duplicates into Rivets copy.

Step 43 : Press CTRL+SHIFT+[ (left square bracket). The Rivets copy moves beneath Rivets layer.

Step 44 : CTRL+CLICK Rivets copy layer thumbnail.

Step 45 : A selection of marching ants surround the Text.

Step 46 : Click on Foreground Color.

Step 47 : The Color Picker opens. Click on a deeper shade of gray. Click OK.

The Foreground Color changes to color picked.

Step 48 : Press ALT+BACKSPACE to fill with Foreground Color. You will not notice any change. This is because the Rivets copy layer which has been filled is hidden by the Rivets layer above it. Press CTRL+D to deselect.
Giving the 3D Effect

Step 49 : Press v (shortcut for Move Tool). Press the Down and Left Arrow keys a number of times. You can now see the darker edge of the Rivets copy layer.

Step 50 : Press CTRL+J. Rivets copy duplicates into Rivets copy 2.

Step 51 : Press the Down and Left Arrow key once each.

Step 52 : Press CTRL+J. Rivets copy 2 duplicates into rivets copy 3.

Step 53 : Press Down and Left Arrow key once. Now you will have to do these steps 3 or 4 times or more depending on the effect you like.

My Text looks like this.

Step 54 : With layer Rivets copy7 highlighted, click on Rivets copy at the bottom. All the layers are highlighted.

Step 55 : All the layers except for Rivets at the top and Background Layer merge into Rivets copy 7.

Step 56 : Press CTRL+J. Rivets copy 7 duplicates into Rivets copy 8.

Step 57 : Press Down and Left Arrow keys once each. My Text looks like this.
Adding the Rivets

Step 58 : Click on Rivets layer.

Step 59 : CTRL+CLICK Rivets layer thumbnail.

Step 60 : A selection is immediately visible around the Text.

Step 61 : Click the New layer icon. A new Layer 1 forms.

Step 62 : Click the Brush Tool.

Step 63 : In the top panel, click to open the Brushes. Click on rivets Brush.

Step 64 : Click on The Brush palette. In earlier versions of Photoshop you can open the Brush controls from a small square at the left side of the top panel.

Step 65 : Click on Scattering. Check both Axes. I have set it to 300%. Both Controls are off.

Step 66 : click on Shape Dynamics. I have set Size Jitter at 25%. The Control is off.

Step 67 : Click on Brush Tip Shape. Drag the Spacing slider at bottom to 50%.

Step 68 : Click the double headed arrow to make the Brush Controls panel go away.

Step 69 : You can see the Brush. To make it big press ] (right square bracket). To make it small press [ (left square bracket). To make it hard press SHIFT+]. To make it soft press SHIFT+[. We will use a hard brush.

Step 70 : Press x and d on the keyboard to restore the default Foreground/Background Colors.

Step 71 : Click on the rivets brush.

Step 72 Make sure the Brush settings for Brush Tip Shape, Shape Dynamics and Scattering are OK.

Step 73 : I have clicked on the text with the Brush. Do it slowly. Do not hurry. If you accidentally click more than wanted press CTRL+Z to undo the last step. After you finish press CTRL+D to deselect.

The Rivets Text.
Finishing Up

Step 74 : I have opened this stone texture. It is a free stock image. You will find it here
It belongs to dsibley

Step 75 : Press CTRL+A (Select ALL), then CTRL+C (Copy). A selection forms around the image.

Step 76 : Click back on the image we were working with. Click on the Rivets Layer.

Step 77 : Press CTRL+V (Paste). The stone texture is pasted above the Rivets Layer.

Step 78 : Press ALT+Click just between Layer 2 and Rivets layer to clip them together. A small circle will be
visible. It is not shown here.

Step 79 : Layer 2 has been clipped with Rivets Layer.

Step 80 : Lower the Opacity of Layer 2 to 75%.

The image looks like this.

Step 81 : Click on Background Layer.

Step 82 : Drag the lock of the Background layer to the Trash Can.

Step 83 : Again go the stone texture. Press CTRL+C.

Step 84 : Return to the image we were working on. Press CTRL+V (paste). The stone texture is pasted as Layer 3 over the Background Layer.

Step 85 : Lower the Fill to 75%.

The image looks like this.

Step 86 : Click on Rivets copy8.

Step 87 : Click the Layer Effects button. Click on Drop Shadow.

Step 88 : In the Drop Shadow I have set the Size at 10, Distance at 6 and Spread at 3. Do not click OK.

Step 89 : Click on Inner Shadow. Drag the Size to 16 and Distance at 5. Now click OK.

Step 90 : Click on Layer 3.

Step 91 : Click on Layer Effects button. Click on Inner Shadow.

Step 92 : Drag the Size and Distance to 100 and 15 respectively. Click OK.

The finished 3D rivet Text.
Other photoshop tutorials are here


