I will be using fonts from the first site, for this tutorial.
I will also be using this free stock image. You will find it
hereI will use it later.
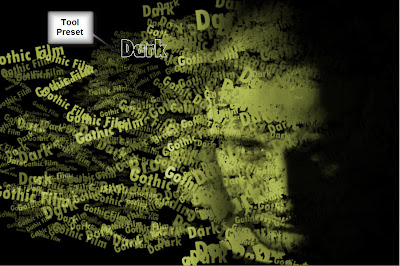
This is the effect I am aiming for.
Step 1 : Click the Horizontal Type Tool.
Step 2 : Set the Font, Size and Color. The Color is by default set to Black.
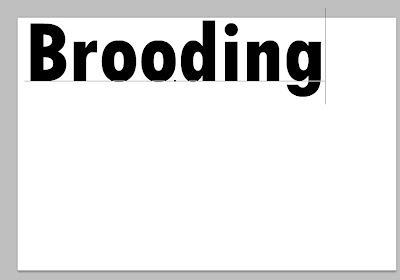
Step 3 : Type out your Text. I have typed Brooding.
Step 4 : Click the Tick Mark in top Panel to commit the Text.
Step 5 : Press v for the Move Tool and move the text to the centre.
Step 6 : Go to Edit>Define Brush Presets.
Step 7 : we will give the Brush a name. I am naming it Brooding. Click OK.
Step 8 : Double click the Text Layer thumbnail.
As soon as you double click, the Text is highlighted.
Step 9 : With the Text highlighted, you can type in new Text. I have typed Dark.
Step 10 : Click the Tick Mark.
Step 11 : Go to Edit>Define Brush Preset.
Step 12 : I am naming this Brush Dark. Click OK.
Step 13 : Again double click the Text Layer thumbnail.
Step 14 : The Text is highlighted.
Step 15 : I am lowering the size of the Font in the top panel. Just type out the value in the box to set the size.
Step 16 : I have typed in new Text - Gothic Film.
Step 17 : Click the Tick Mark.
Step 18 : Go to Edit>Define Brush Preset.
Step 19 : I have typed in Gothic Film as the name of the Brush. Click OK.
Step 20 : Click off the eye icon on the Text Layer. Click on the Background layer.
Step 21 : The Foreground/Background colors should be set to the default Black/White. If it is not press x and d on the keyboard.
Step 22 : Press ALT+BACKSPACE to fill with Foreground Color, which is Black in this case.
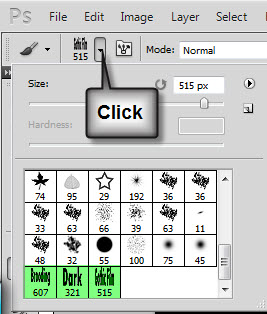
Step 23 : Press b for the Brush Tool. Click in the top panel to reveal the Brush Controls. You will find the three Text Bushes at the bottom.
Step 24 : Click the Brushes on the right hand side for the Brush controls. If you don't find it go to Windows>Brush..
Step 25 : Click the Brush Tip Shape at the top. Drag the Spacing slider to 200%. You can see the Brush change.
Step 26 : Click Shape Dynamics. Drag the Size Jitter slider to 100%. For Control if you use a Pen tablet set it to Pen Pressure or change it to Fade.
Step 27 : Drag the Scatter slider to 100% and check Both Axes.
Step 28 : Click on Transfer. drag the Opacity Jitter and Flow Jitter sliders to 100%.
Step 29 : Open up the image. Press v for the Move Tool. Press shift and drag and drop it onto the Black document.
Step 30 : The image is on the large size. Press SHIFT+ALT and drag down the top left handle diagonally to resize.
Step 31 : After resizing position the image at the right side of the image and press ENTER.
Step 32 : Click off the eye icons on the Text layer and the image layer (Layer2) below it. Click the New layer icon and a new Layer 3 forms below Layer2.
Step 33 : Press b to bring up the Brush Tool. Click on the Brooding Brush.
Step 34 : Make the Brush smaller by pressing [ (left bracket). To make the Brush large press ] (right bracket).
Step 35 : Press x on the keyboard to switch the Foreground Color to White.
Step 36 : Press SHIFT and paint in a straight line to left. I am using a Pen Tablet. I am varying the Pen Pressure. Where I am applying pressure, the Brush appears more strongly and fades when I release the Pressure.
Step 37 : We must save the Brush with the attributes. Click to open the Brush controls.
Step 38 : Click to open the New Tool preset.
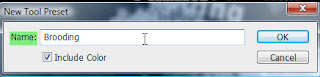
Step 39 : Name the New Tool Preset Brooding. Click OK.
Step 40 : Click on the Second Brush which is Dark.
Step 41 : Click Brush Tip Shape. Drag the Spacing slider to 200%.
Step 42 : Click Shape Dynamics. Drag Size Jitter to 100%. Change Control to Pen Pressure if you are using a Pen Tablet or turn it to Fade.
Step 43 : Next click on Scattering. Drag the Scatter slider to 100%. Check Both Axes.
Step 44 : Click on Transfer. Drag the Opacity Jitter and Flow Jitter to 100%.
Step 45 : Now save it as a New Tool Preset as earlier.
Step 46 : Name the New Tool preset as Dark. Click OK.
Step 47 : Click with the Brush instead of painting. I am using the brush on the right side, because there is where the image is.
Step 48 : Turn on the eye icon of Layer2 (the once containing the image). and Layer 3 to clip the Layers.
Press ALT and click between Layer2 and 3.
Step 49 : After making the clipping layer, the image looks like this.
Step 50 : Click back on Layer2.
Step 51 : Continue painting with the Brush and the face becomes visible slowly.
Step 52 : Click on Layer 2. Click the Add Layer Mask button. A layer Mask forms on Layer2.
Step 52 : Click the Gradient Tool.
Step 53 : Click the Gradient Editor in the top panel.
Step 54 : Click the Foreground to Background preset. Click OK in Gradient Editor.
Step 55 : Press Shift and you can drag the Gradient Tool in a straight line. I have not dragged the Gradient Tool over the entire image, but just a portion of it.
The image looks like this.
Step 56 : Click on Layer 3 again.
Step 57 : Press b for the Brush Tool. Click on the last Brush Gothic Film.
Step 58 : Click Brush Tip Shape. Drag the Spacing slider to 200% as earlier.
Step 59 : Click on Shape Dynamics. Drag the Size Jitter to 100%.
Step 60 : Click on Scattering. Drag the Scatter slider to 100%. Check Both Axes.
Step 61 : Click On Transfer. Drag the Opacity Jitter and Flow Jitter to 100%.
Step 62 : Click with the Brush as I have done around the image. Go over the face to reveal more of it.
Step 63 : Click on Layer 2.
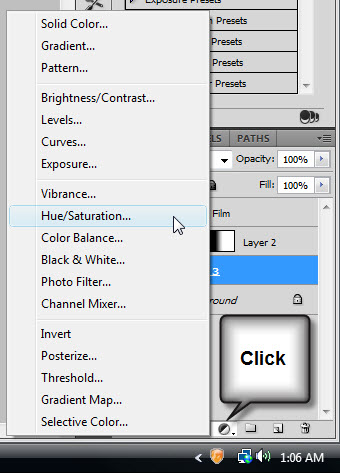
Step 64 : Click the Add New Fill or Adjustment Layer button and click on Hue/Saturation.
Step 65 : In the Hue/Saturation check Colorize.
The image looks like this.
Step 66 : These are the settings I have given for Hue, Saturation and Lightness. There is nothing hard and fast about it. You can give any setting you want that pleases you.
Step 67 : Click again on Layer 3.
Step 68 : Bring up the Tool Presets and click on any of Brushes we saved. I am clicking on Dark.
Step 69 : Paint some more with the Brush.
Step 70 : Click on the top Text layer. Turn on the eye icon.
Step 71 : Press v for the Move Tool and move the Text in the position you want.
Step 72 : CTRL+CLICK on the Text layer thumbnail.
Step 73 : A selection of marching ants surround the Text.
Step 74 : Right click the Text Layer and click Rasterize Type.
Step 75 : I have clicked on Pure Yellow in the Swatches palette.

The Foreground Color changes to Pure Yellow.
Step 76 : Press ALT+BACKSPACE. The text fills with the color. Press CTRL+D to deselect.
Step 77 : Click on the fx button. Click on Blending Options.
Step 78 : Click on Stroke. Click on Color.
Step 79 : The Select Stroke Color dialogue box opens. Type in ffffff in the highlighted box in the bottom. It stands for White.
Step 80 : I have dragged the Size slider to 4 pixels and changed the Position to Inside. Do not click OK.
Step 81 : Click on Drop Shadow.
Step 82 : I have set the Distance at 10 and Size at 6. Click OK in the Layer Styles.
The finished Text as Brush. You can use this method to create your own posters.
Other Photoshop tutorials are
here


 This is the effect I am aiming for.
 Step 1 : Click the Horizontal Type Tool.
 Step 2 : Set the Font, Size and Color. The Color is by default set to Black.
 Step 4 : Click the Tick Mark in top Panel to commit the Text.
 Step 5 : Press v for the Move Tool and move the text to the centre.
 Step 6 : Go to Edit>Define Brush Presets.
 Step 7 : we will give the Brush a name. I am naming it Brooding. Click OK.
 Step 8 : Double click the Text Layer thumbnail.
 As soon as you double click, the Text is highlighted.
 Step 9 : With the Text highlighted, you can type in new Text. I have typed Dark.
 Step 10 : Click the Tick Mark.
 Step 11 : Go to Edit>Define Brush Preset.
 Step 12 : I am naming this Brush Dark. Click OK.
 Step 13 : Again double click the Text Layer thumbnail.
 Step 14 : The Text is highlighted.
 Step 15 : I am lowering the size of the Font in the top panel. Just type out the value in the box to set the size.
 Step 16 : I have typed in new Text - Gothic Film.
 Step 17 : Click the Tick Mark.
 Step 18 : Go to Edit>Define Brush Preset.
 Step 19 : I have typed in Gothic Film as the name of the Brush. Click OK.
 Step 20 : Click off the eye icon on the Text Layer. Click on the Background layer.
 Step 21 : The Foreground/Background colors should be set to the default Black/White. If it is not press x and d on the keyboard.
 Step 22 : Press ALT+BACKSPACE to fill with Foreground Color, which is Black in this case.
 Step 24 : Click the Brushes on the right hand side for the Brush controls. If you don't find it go to Windows>Brush..


