


Actions in Photoshop help to reduce repetitive work. For example I will show how you can make a vignette with one photo and then apply them to another with ease. I have posted an earlier tutorial on Actions here.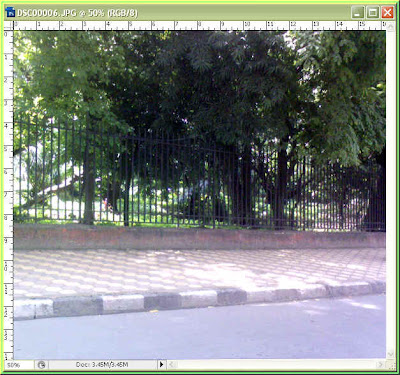
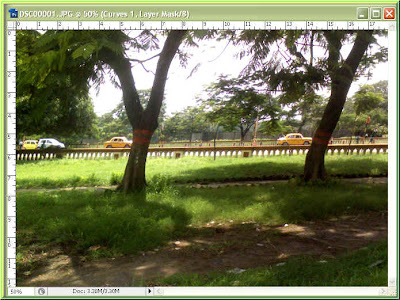
Step 1 : The first step is to create the vignette, I have opened this photo in Photoshop.
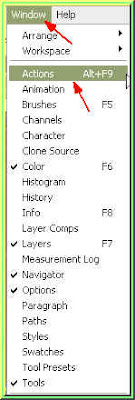
Step 2 : Go to Window>Actions. This is Photoshop CS 3 Extended. You will find Actions lower down in the popup in Photoshop 7.
 This is the Actions dialogue box. There are some built in Actions, both in Photoshop7 and higher versions. In Photoshop7 the built in options are less. That, however, does not matter.
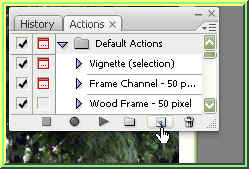
This is the Actions dialogue box. There are some built in Actions, both in Photoshop7 and higher versions. In Photoshop7 the built in options are less. That, however, does not matter.Step 3 : Click the New Actions button shown by the small white hand.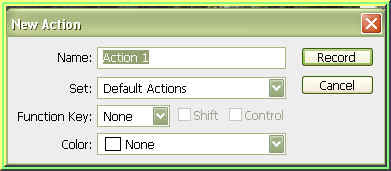
Step 4 : This dialogue box pops up.
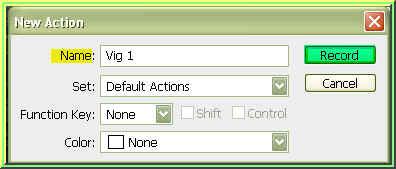
Step 5 : Give your Actions a name. I have typed in Vig 1. Any name will do as long as it conveys what the Actions is about. Then click the Record button (highligted in green). As soon as you click it, whatever steps you take in photoshop will be recorded.

Step 6 : The Action is being recorded. The button which the red arrow points to has turned red. The Vig1 is also visible, which was the first step I took.
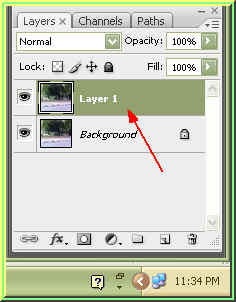
Step 7 : Press CTRL+J on the keyboard and the Background will be duplicated as Layer 1 in the Layers pallette.
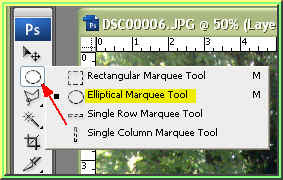
Step 8 : Click the Elliptical Marquee Tool to select it.
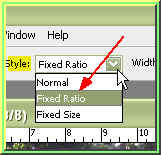
Step 9 : Look in the top panel and change the Style to Fixed Ratio from the dropdown.
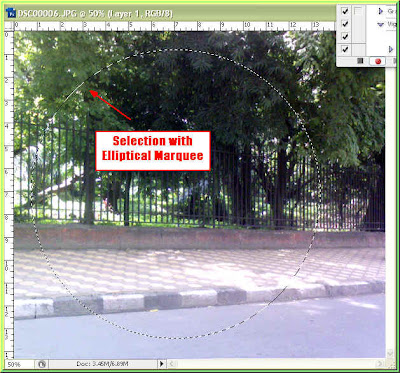
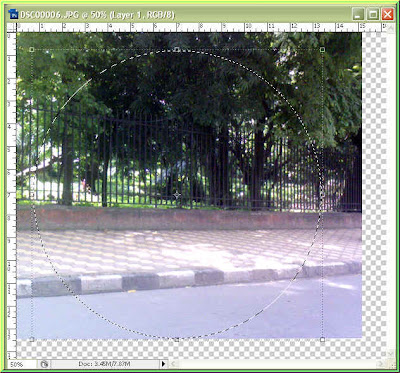
Step 10 : I have drawn a selection with the Elliptical Marquee Tool. Notice is that I have not bothered to make the selection right in the centre. I will fix that. Press CTRL+T. A selection forms around the circle.
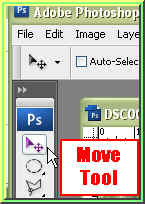
Step 11 : Click the Move Tool.
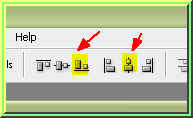
Step 12 : Look in the top panel and you will find these six icons. Click the 4rd and 5th ones.

Notice that the selection has moved. You will be able to make it out with another step.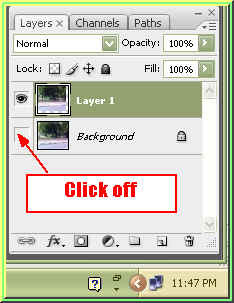
Step 13 : Click of the eye icon of the Background.
Step 14 : Now the background layer has disappeared.
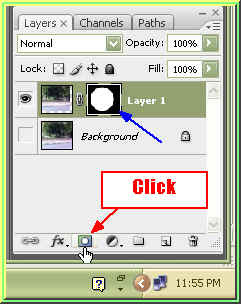
Step 15 : Now click the Add Layer Mask button shown by the small white hand and the Layer mask forms next to the layer thumbnail on Layer 1.
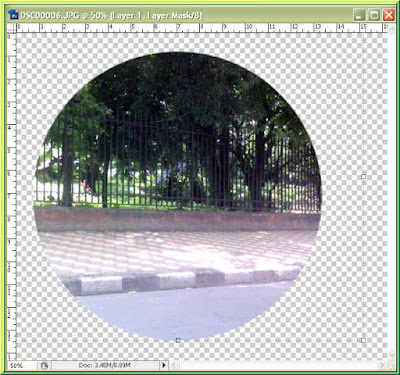
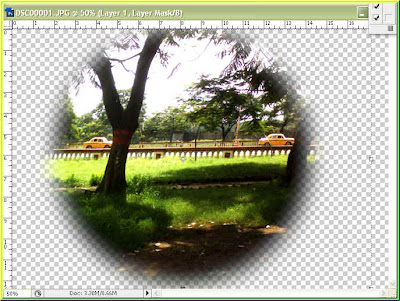
Step 16 : The vignette has formed, but it not exactly in the middle.
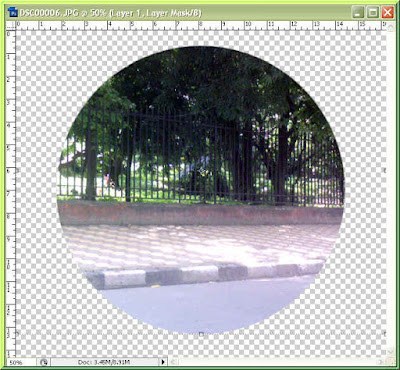
Step 17 : Use the Move Tool to drag it into the middle.
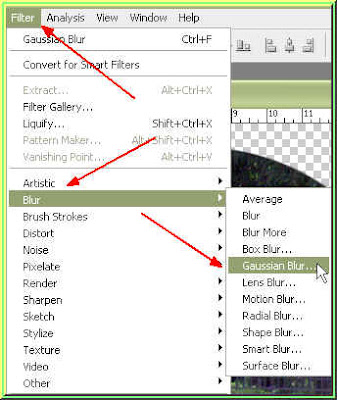
Step 18 : Go to Filter>Blue>Gaussian Blur.
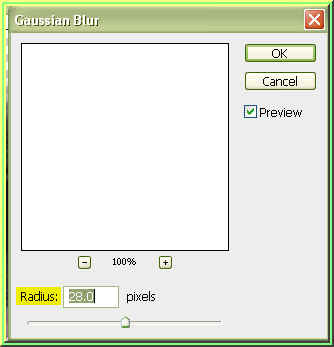
Step 19 : The Gaussian Blur dialogue box opens. Drag the Radius slider suitably to blur the edge of the selection. You will be able to see the effect as you drag the slider. I have put a Radius of 28 pixels. I am clicking ok.
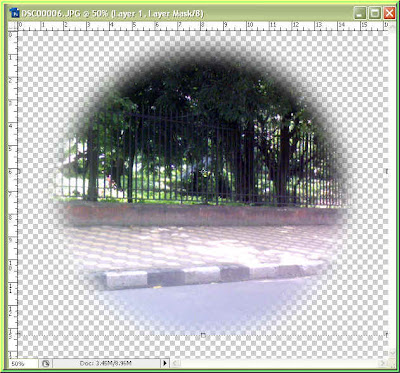
Step 20 : The edges of the selection has been blurred nicely.
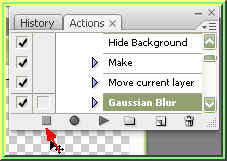
Step 21 : Now click the Stop button shown by the red arrow. It turns grey after the recording stops. The Action has been recorded.
Step 22 : I have closed the other image and have opened this one.
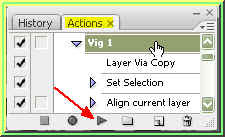
Step 23 : I have brought up the Actions pallete again and clicked on Vig 1. Now I will click the Play button shown by the red arrow.
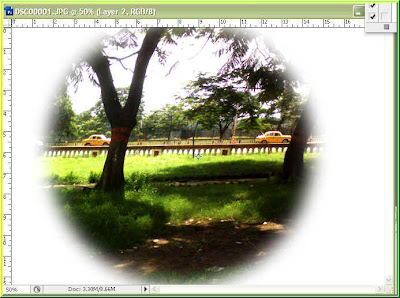
Step 23 : There is the vignette.
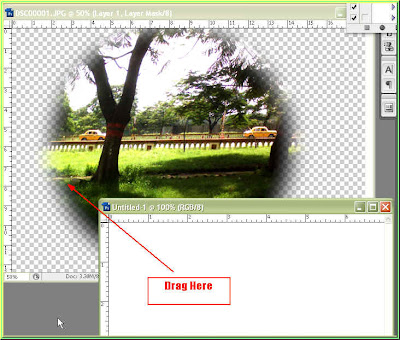
Step 24 : Open a New White Layer and drag it onto the image till it completely covers it.
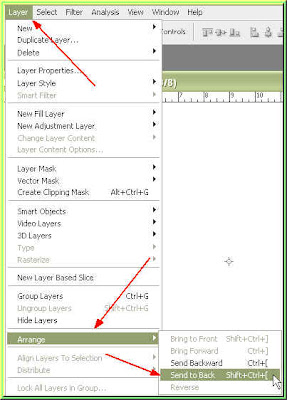
Step 25 : Go to Layer>Arrange>Send to back.
Step 26 : The White layer has gone to the Back.
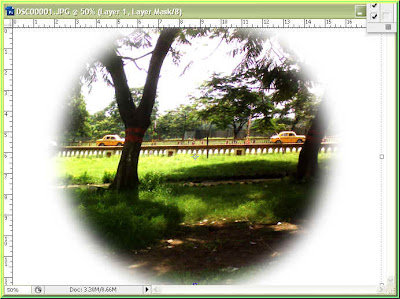
Use the Move Tool to drag the vignette to the middle of the White Layer. That is all.
You can find some free Photoshop Actions on the internet which you can install.
You can find some free Photoshop Actions on the internet which you can install.


