


Step 5 : Draw a text box with the cursor by dragging.
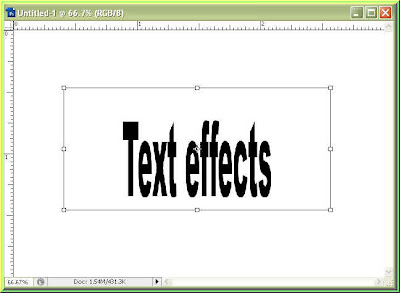
Step 6 : I have typed the text. Step 7 : To commit the text. Click this tick mark on the top panel at right.
 Step 8 : You will find the Text Layer above the Background in the Layers pallette. The Text is always in its own layer.
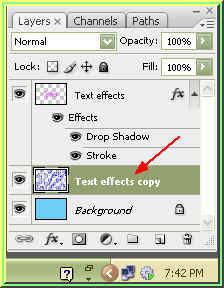
Step 9 : Press CTRL+J and the text layer will be duplicated. The duplicate layer here is Text effects copy.

Step 10 : Click off the eye icon in the Text effects Layer. Note that Text effects layer copy is highlighted which means we are currently working on it. The layer we work on is always highlighted.
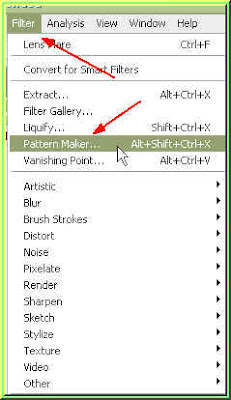
Step 11 : Go to Filter>Pattern Maker. Step 12 : As soon as you click, this dialogue appears. Click ok. Type has to be rasterised to be editable.
Look at the Text effects copy layer now. It has become editable.
Step 13 : The Pattern Maker dialogue box opens. At the left top corner is the Marquee Tool for drawing a selection.

On the right is the controls. Click the Use Image Size.

Step 14 : With the Marquee Tool shown in Step 13 draw a selection around the text. You do not have to be accurate.

Step 15 : Click Generate.

The pattern has been generated. But that is not all.
Now click Generate Again.

It has been generated again.

Click Generate Again.

It has been generated again.
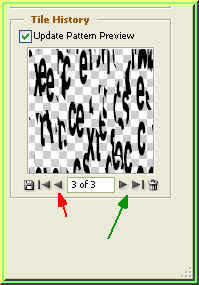
Step 16 : Look at the Tile History at the right bottom of Pattern Maker. Every time it generated a pattern it saved it. You can see that it is showing 3 of 3. I generated the patterns thrice. It is showing the last pattern generated. The arrow keys at both sides are to scroll through the patterns that were generated.
Step 17 : I have scrolled back to the first pattern generated by clicking on the arrow at the left. It is therefore showing 1 of 3. You can scroll backwards or forwards. I have chosen the first pattern generated.
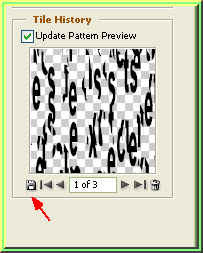
You can also save the patterns generated if you want to for later use by clicking the save icon shown by the red arrow. I am not saving it though.
Step 18 : Click ok in the Pattern Maker. And the pattern is now visible.
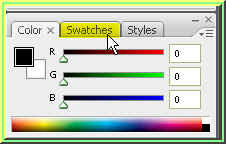
Step 19 : Click on Swatches. Step 20 : In Swatches I have clicked on a Blue color.
Note as soon as I click the Blue the Foreground color changes to the same color.
Step 21 : Now press ALT+BACKSPACE to fill the selection with the color. Press CTRL+D to deselect.
Step 22 : Turn on the eye icon in Text effects layer.

Step 23 : Now drag up the Text effects layer to the top.

Step 24 : The Text effects layer is now on top of Text effects copy layer.

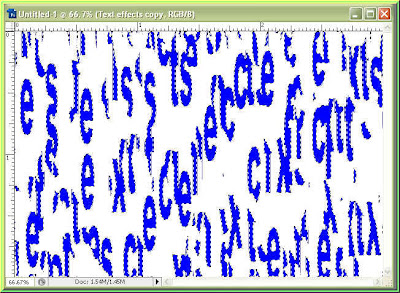
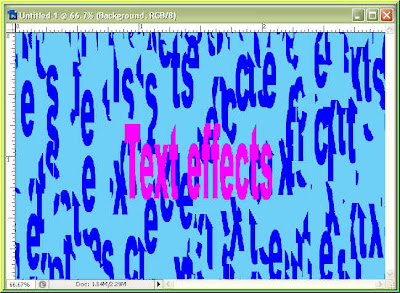
This is how the image looks.

Step 25 : Go to Layer>Rasterize>Type.
Step 26 : The Text effects layer has been rasterized.
Step 27 : CTRL+Click the Text effects layer thumbnail.

Step 28 : The text is now selected.

Step 29 : I am selecting this color.

The Foreground Color changes to the color I picked.

Step 30 : Press ALT+BACKSPACE and the text fills with the color I picked. Press CTRL+D to deselect.
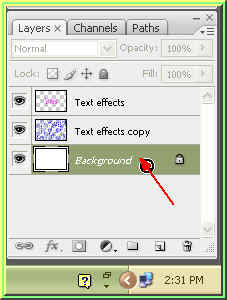
Step 31 : Click on the Background.
Step 32 : I have clicked on a light blue color.
Step 33 : Press ALT+BACKSPACE to fill the Background with the selected color.

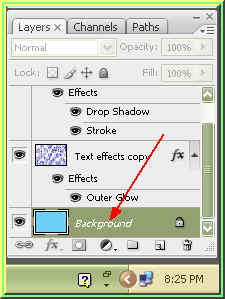
Step 34 : Click on the Text effects layer.

Step 35 : Click on the Layer Style Button.

Step 36 : Click on Blending Options.

Step 37 : The Blending Options dialogue box opens.
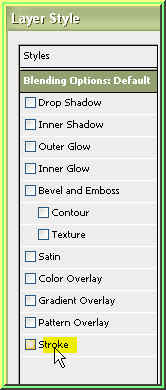
Step 38 : Click where the white arrow points two and the Stroke dialogue box will open. Step 39 : Click the red color box to open the Color Picker.
Step 40 : I have clicked on the White at the left top of the Color Picker. Click ok.

Step 41 : I am leaving the default options. DO NOT click ok in Blending Options as yet..

The white Stroke has been applied.
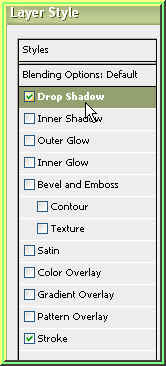
Step 42 : Now click on Drop Shadow. The Drop Shadow dialogue box will open.
Step 43 : First drag the Distance and Size sliders slightly then the Spread slider and lastly reduce the Opacity to 50 %.

The Drop Shadow has been applied. Click ok in Blending Options.
Step 44 : Click on the Text effects copy layer. Step 45 : CTRL+CLICK the layer thumbnail.
The selections has been made.
Step 46 : Now click on Blending options.

Step 47 : Click on Outer Glow.

Step 48 : I have dragged the Size slider a bit and reduced the Opacity to 50 %. Click ok.
Step 49 : Click on the Background.
Step 50 : Go to Filter>Noise>Add Noise.

Step 51 : The Add Noise dialgue box opens. I have set the Amount to 100, Distribution at Gaussian and checked the Monochromatic box. Click ok.

Step 52 : Go to Filter>Blur>Radial Blur.

Step 53 : Motion Blur dialogue box opens. I have set the Angle at -90 degrees and the Distance at 17 pixels.
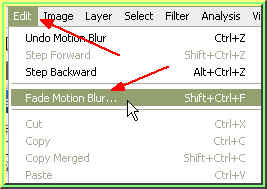
Step 54 : Go to Edit>Fade Motion Blur.
Step 55 : Reduce the Opacity by 50 % in the Fade box.

Step 56 : This is how the image looks.
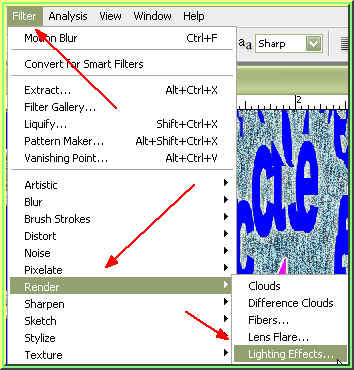
Step 57 : Go to Filter>Render>Lighting Effects.
Step 58 : The Lighting Effects dialogue box opens. Make sure Style is set to Default and click ok.
This is how the image looks.
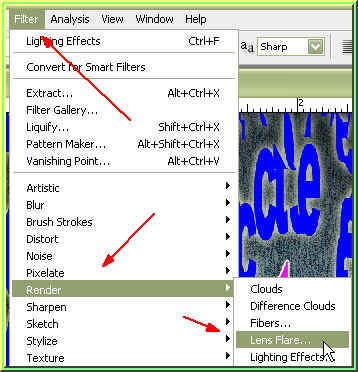
Step 59 : Go to Filter>Render>Lens Flare.

Step 60 : The Lens Flare dialogue box opens. You can use the cursor to position the flare wherever you want to. I have chosen 105 Prime. Click ok.

The completed image. None of the settings I have shown are hard and fast. You can tweak them as you like and you might come up with something even better.


