This is a tutorial on using the Gradient Map to tint an image and then restoring color selectively.
It is easy and can be done easily First you need an image.
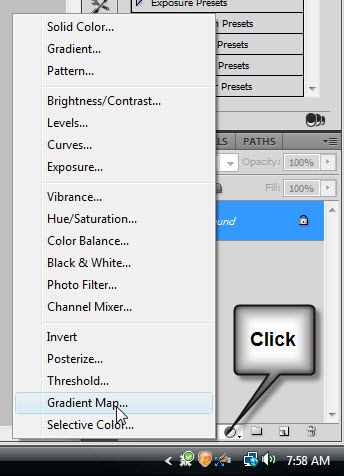
Step1 : Click the New Fill or Adjustment Layer button. Click Gradient Map from the pop up.
Step 2 : The Gradient Map 1 Layer forms over he background.
The image looks like this.
Step 3 : Click to bring up the Gradient Editor. You can see a black stop at bottom left and a white stop at bottom right.
Step 4 : Click the Black Stop. The Color changes to Black. It was grayed out earlier.
Step 5 : Click the Color. The Select Stop Color dialogue box opens. It is the same as the Color Picker.
Step 6 : In the Set Stop Color move the tiny slider at the bottom to select Orange tones. Select a dark color by clicking. The value of the color is given in the green highlighted box at the bottom if you want the exact color.
Step 7 : You will find that the stop Color has changed to the color picked.
The image looks like this.
Step 8 : Hover the cursor around 1/4th of the way from the Color stop at right. The cursor will change into a hand.
Step 9 : Click with the hand. This will add a new Color Stop. In the Location box type 25.
Step 10 : The image looks like this.
Step 11 : Click 1/4th of the way from the right (White) stop.
Step 12 : As soon as the Color Stop reappears, type 75 in the Location box.
Step 13 : Click the Color.
The image looks like this.
Step 14 : Clicking on Color brings up the Select stop color. Click on a lighter shade. The numerical value immediately changes. It represents the shade. Click OK in the Select stop color. Click OK in the Gradient Editor.
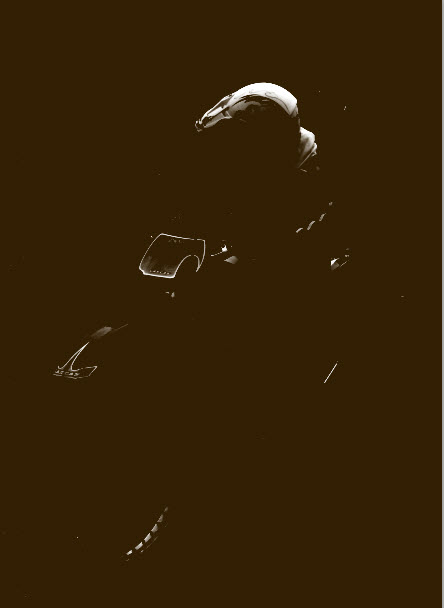
The image has been nicely tinted.
Step 15 : The Foreground Color should be Black and Background White. This is the default setting. If the Foreground/Background color is not set to the default, press X and D on the keyboard.
Step 16 : Zoom into the image.
Step 17 : Press B for the Brush Tool. You can make it large by pressing ] (right bracket and [ (left bracket) to make it small. To make the Brush soft press SHIFT+[ (left bracket) and to make it hard SHIFT+] (right bracket). These are shortcuts.
Step 18 : Before beginning to paint make sure that the layer mask is selected on Gradient Map 1 layer. If it is selected there is tiny border around it. Click to select the mask.
Step 19 : Paint with the Brush to reveal the color.
If you paint away a portion wrongly, switch the Foreground Color to White by pressing X and paint away the mistake, then press X again and continue painting with the Foreground Color set to Black.
Step 20 : Paint away to reveal the color in parts of the image you want.
Step 21 : Zoom into the image to paint portions that may have been left out or where you have strayed away. Remember to press B (for the Brush Tool) to continue painting after clicking the Zoom Tool.
I have just revealed the Blue color of the motorcycle. Now just supposing that you don't like the blue color as it does not go well with the tinting, can be something be done?
Step 22 : Click the Background Layer.
Step 23 : Click the New Fill or Adjustment Layer button. Click Hue/Saturation from the pop up.
Step 24 : Drag the Hue slider either to the left or right.
The color of the motorcycle changes.
Step 25 : I want to motorcycle to be red. I have pushed the Hue slider to the red in Hue. I wish to keep it bright red so I have pumped up the Saturation and the Lightness slightly.
My finished image.
Other photoshop tutorials are
here