Step 1 : Open a new White Document and click the Horizontal Type Tool.
Step 2 : Select a Font and set the Size at the top.
Step 3 : I have typed out my Text.
Step 4 : Click the Tick Mark in the top panel.
Step 5 : Click on Styles. These are the default Styles in Photoshop.
Step 6 : Click on the small black arrow at the top right and you can find more Styles tucked away in Photoshop. I will be using the default Styles.
Step 7 : I have clicked on Chrome Satin.
The image looks like this.
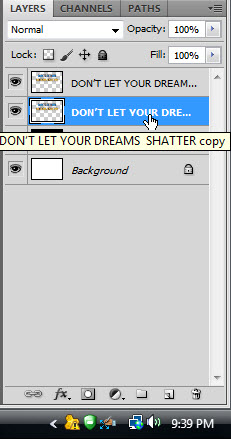
The Layers palette looks like this.
Step 7 : Press CTRL+J. The Text ;layer duplicates.
Step 8 : Click on the bottom Text layer.
Step 9 : Drag the Effects to the Trash Can.
Step 10 : I am now clicking on the Nebula Style.
Step 11 : Click off the eye icon to be able to see the application of the new Style.
This is how the underlying Text looks like after the application of the Style. Click back the eye icon of the top Text layer.
Step 12 : Press CTRL+T. A selection forms.
Step 13 : Press SHIFT and drag sideways till the underlying Text layer is visible and you have a 3D effect.
Press ENTER.
Step 14 : Press SHIFT and click on the top Text layer. Both the Text layers are highlighted.
Step 15 : Press CTRL+E to merge both the layers.
Step 16 : Click on the Background layer.
Step 17 : Click the New layer icon, A new Layer 1 forms over the Background layer.
Step 18 : The Foreground Color should be set to Black.
Step 19 : Press ALT+BACKSPACE to fill Layer 1 with Black.
Step 20 : Click on the Text Layer. Press CTRL+J. The Text layer duplicates.
Step 21 : Click on the bottom Text Layer.
Step 22 : Press CTRL+T. A selection forms.
Step 23 : Right click inside the selection and click on Flip Vertical from the menu.
Step 24 : Drag the flipped Text down for making a reflection. Use the Down and Up arrow keys to align the flipped Text with the one above. Press ENTER.
Step 25 : Click the Rectangular Marquee Tool.
Step 26 : Draw out a selection around the flipped Text.
Step 27 : Click the Layer Mask button. A Layer Mask forms on the bottom Text layer.
Step 28 : Click the Gradient Tool.
Step 29 : Click in the top panel to reveal the Gradient Presets. Click on the first one.
Step 30 : Click the Linear Gradient icon. It is selected by default.
Step 31 : Press SHIFT and you will be able to drag up straight up with the Gradient Tool. Do not drag to the top.
The Text looks like this.
Step 32 : Click on Layer 1.
Step 33 : Open the Glass Texture. Press CTRL+A (Select All), then CTRL+C (Copy).
Step 34 : Go to the other document and press CTRL+V (Paste).
The Glass Texture has been pasted above Layer 1 which is filled with Black.
Step 35 : Zoom out. Press CTRL+T. A selection forms. Clearly the Texture is much larger than the image.
Step 36 : Press SHIFT+ALT and drag the corner handles to resize the Texture proportionately. Press ENTER.
Step 37 : Change the Blend Mode to Screen.
Step 38 : Lower the Fill to 70%.
The image looks like this.
Step 39 : CTRL+CLICK the New Layer icon. A new Layer 3 forms under Layer 2.
Step 40 : Click the Gradient Tool. Click on the Chrome Gradient from the Presets.
Step 41 : Drag diagonally from top to bottom with the Gradient Tool.
The image looks like this.
Step 42 : Decrease the Opacity of Layer 3 to 40%.
The image looks like this.
Step 43 : Click on the top Text layer.
Step 44 : Click on the Type Tool.
Step 45 : Click in the top panel to change the Text color.
Step 46 : In the Select text color type in ffffff. It stands for White. Click OK.
The Text Color has changed to White.
Step 47 : I have selected a different Font and typed in my Text.
Step 48 : Press v for the Move Tool and move the Text to the right. That's all.
Other Photoshop tutorials are
here


 This is the 3D Text I will make.