A Clipping Layer lets you mask a Layer beneath. For example if you have Text and a number of images on layers above it, you can clip them all together so that they only show through the Text. The rest is masked out. You can use multiple images in a clipping mask, but they have to be on successive layers. But it is very versatile. You can resize the images or even change the order of the layers after clipping them.This has been created with clipping Masks.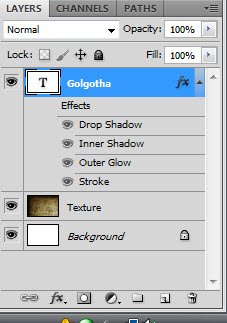
Step 1 : I have opened a Texture which is just above the Background Layer. Over it I have put a Text Layer.
I have typed in my Text over the Texture Layer.
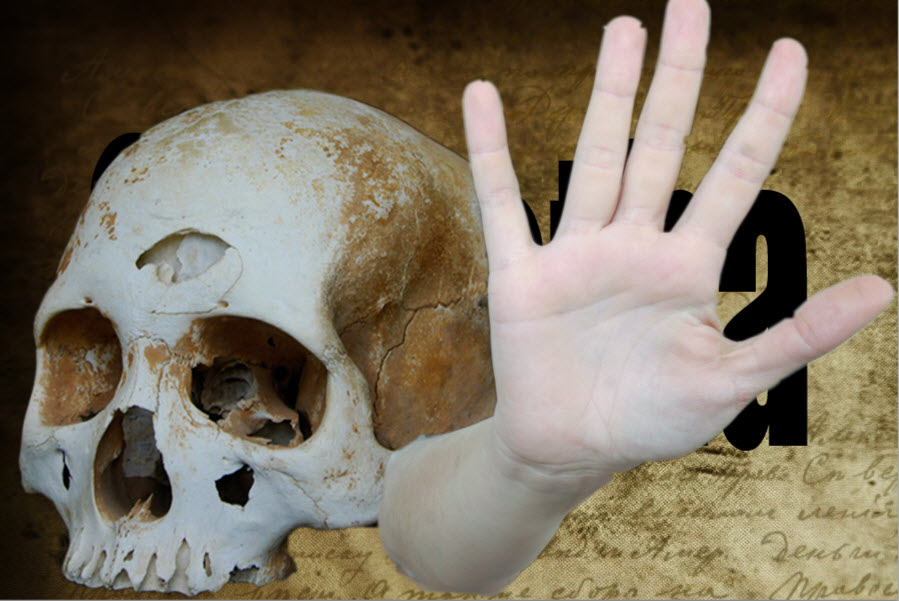
Step 2 : I have also opened this free stock image of a skull. I have got the images from
Step 3 : I added this hand also. Step 4 : I have clicked on Layer 2, then keeping SHIFT pressed clicked on Layer1. Both Layers are highlighted.Step 5 : Right click the highlighted areas and click on Create Clipping Mask.Step 6 : The two layers have been clipped with the Text layer. There is more to it that can be done.Step 7 : Click on Layer 1.Step 8 : Press CTRL+T. A selection forms.Step 9 : Press SHIFT+ALT. You can drag the comer handles to resize the image proportionately inside the Text. You can let of SHIFT and ALT and also drag in the middle handles. Press ENTER after resizing.Step 10 : Click on Layer 2.Step 11 : Press CTRL+T. A selection forms again.Step 12 : Press SHIFT+ALT and resize. Press ENTER.Step 13 : I have opened another Texture which is on Layer 3 i.e. it is over the two clipped layers below it.Step 14 : I have clipped it with the clipped layers underneath.Step 15 : Drag Layer 3 below layer 1.Step 16 : Layer 3 has been dragged below Layer 1.The image looks like this.I have added some Layer Styles to the Text Layer.The finished image. Other photoshop tutorials are here


 This has been created with clipping Masks.