


This is another advanced Text tutorial, but it should be easy to follow. We will be using Layers, Layer Styles and Smart Objects as well as Filters found in Photoshop. You do not need anything else. Some steps have been added for the sake of those new to Photoshop, which those more experienced can skip.
First we need an image, which will be the background.

Step 1 : I will be using these free stock image. You will find it here
It belongs to mjranum-stock

Step 2 : Click the New Layer icon. A new Layer 1 forms.

Step 3 : The Foreground/Background colors should be set the default Black/White. If it is not press x and then d on the keyboard.

Step 4 : Layer 1 is filled with Black.

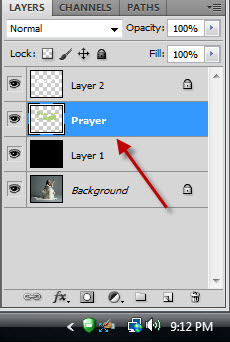
Step 5 : Turn off the eye icon on the Background Layer.

The image looks like this.

Step 6 : Click the Horizontal Type Tool.

Step 7 : Draw out the Text Box.

Step 8 : Select the font from the drop down menu. I have selected Impact. It is found in all versions of Photoshop. I have set the Font Size at 500 pt. (This is a high resolution image).

Step 9 : I have selected Centre Text as margin. Click to set the Font Color. The default Color is Black.

Step 10 : The select Text Color dialogue box opens. Tyep in ffffff in the highlighted box in the Centre. It represents White. Click OK.

Step 11 : I have typed in my Text.

Step 12 : Click the Tick Mark in the top Panel to commit the Text.

Step 13 : To make the Text larger, drag out the four corner handles.

Step 14 : Click the Tick Mark in the top panel.

Step 15 : Click the Swatches pane. Click on the Light Pea Green. all the Swatches have a name. Hover the cursor over each color to read the names. You can select any color.

The Foreground Color changes to the color picked.

Step 16 : Press ALT+BACKSPACE. The Text fills with the Foreground Color which is the Light Pea Green.

Step 17 : Right Click the Text Layer. Click on Rasterize Text from the popup.

The Text has been Rasterized.

Step 18 : Click the Polygon Lasso Tool.

Step 19 : Click with the Lasso at the left of the letter P, click outside the letter r, then outside the letter P and then back to the starting point.

Step 20 : Go to Layer>New> Layer via Cut.

Step 21 : The selection is cut and pasted onto Layer 2.

Step 22 : CTRL+CLICK the layer thumbnail on Layer 2.

A selection forms.

Step 23 : Go to Select>Modify>Expand.

Step 24 : The expand Selection dialogue box opens. I have set Expand by at 10 pixels. If you use a low resolution image set it at 2 or 3. Click OK.

Step 25 : Click the Text Layer and press DELETE.

The image looks like this.

Step 26 : Click on Layer 2. Click on the Lock transparent pixels icon on top.

Step 27 : Go to Edit>Fill.

Step 28 : In the Fill dialogue box, change the Use to White. Click OK.

Step 29 : Press CTRL+D to deselect. The image looks like this.

Step 30 : Click the Move Tool or press v for the keyboard shortcut.

Step 31 : Press the left Arrow Key 10 times. (Nothing hard and fast about it). You get this effect.
Step 32 : Click again on the Text layer.

Step 33 : Click the Layer Effects button. Click on Stroke from the popup.

Step 34 : In the Stroke dialogue, click on Color.

Step 35 : Type in ffffff in the highlighted box at the bottom. Click OK. The Color of the Stroke changes to White.

Step 36 : I have set the Size of the Stroke at 10 and the Position to Inside. Click OK.

The Text looks like this.

Step 37 : CTRL+CLICK on the layer thumbnail of the Text layer.

Step 38 : Now press CTRL+SHIFT and click on the Layer thumbnail of Layer2.

Step 39 : Marching ants select both the Layers or the entire Text.

Step 40 : Press CTR+CLICK on New layer icon. A new Layer 3 forms under the Text layer.

Step 41 : Go to Edit>Fill.

Step 42 : In the Fill dialogue change the Use to 50% Gray. Click OK.

Step 43 : The selection fills with 50% Gray in Layer 3.

Step 44 : Click off the eye icons on Layer 2 and Text Layer.

Step 45 : Press CTRL+D to deselect. The image looks like this.

Step 46: Click on the Layer Styles button. Click on Stroke from the pop up.

Step 47 : Click on Color in the Stroke dialogue box. The Select Stroke Color dialogue open. Now just click on the Gray text. The Color of the Stroke changes to Gray from Black. Click OK in Select Stroke Color.

Step 48 : The Position is set to Outside by default. Let it remain. Drag the Size slider keeping a watch on the image.

Step 49 : Drag the Size slider till all bits of Black inside the Gray disappears. Click OK.

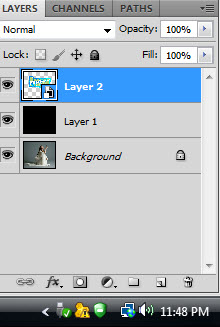
Step 50 : Press CTRL+CLICK the New Layer icon. A new Layer 4 forms under Layer3.

Step 51 : Click again on Layer3. Press CTRL+E.

The two layers merge in Layer4.

Step 52 : Click on the New Layer icon. A new Layer 5 forms above Layer 4.

Step 53 : Press x and then d to reset the Foreground/Background Colors to the default.

Step 54 : Click the Gradient Tool. Click in the top panel to open the Gradient Editor.

Step 55 : Click the first Preset in the Gradient Editor. It is the Foreground to Background. Click OK.

Step 56 : In the top panel Linear Gradient should be selected. It is by default.

Step 57 : Drag down diagonally from top left as shown.

The image looks like this.

Step 58 : Go to Filter>Pixelete>Color Halftone.

Step 59 : The Color Halftone dialogue box opens.

Step 60 : Change the Max Radius to 25 and Channel 1,2,3,4 to 0 each. Click OK.

Step 61 : The Color Halftone.

Step 62 : Click of the eye icon on Layer 5.

Step 63 : Click on Layer 4.

Step 64 : In the Swatches I am clicking on Light Cyan.

Step 65 : The Foreground Color changes to the color picked.

Step 66 : Lock the Transparent pixels of the layer.

Step 67 : Press ALT+BACKSPACE. The graphic created earlier is filled with the selected color.

Step 68 : Click on Layer 5. Turn on the eye icon of the layer. Press ALT. Place the cursor between Layer 5 and Layer 4 to clip the layers.

Step 69 : The Layer 5 thumbnail has a bent arrow pointing down. It means Layer 5 has been clipped with Layer4.

The graphic looks like this.

Place the cursor on the graphic and you will be able to move it around.

Step 70 : Press CTRL+T. A selection forms. Right click inside. From the popup click on Warp.

Step 71 : Warp with the handles in any direction you please. Press Enter.

Step 72 : The Graphic looks like this after applying the Warp.

Step 73 : Turn on the eye icons of Layer 2 and Text Layer.

The Text looks like this.

Step 74 : Click on Layer 2. Press SHIFT and click on the Text layer. Both layers are highlighted.

Step 75 : Right lick the highlighted layers. Click on Convert to Smart Object from the popup.

Step 76 : The Layers are converted into a Smart Object.

Step 77 : Click on the Layer Styles button. Click on Drop Shadow from popup.

Step 78 : I have dragged the Size to 10, the Distance to 19, Spread to 7 and lastly lowered the Opacity to 50%. Click OK.

Step 79 : Click on Layer 2. Press SHIFT and click on Layer4. All three layers are highlighted.

Step 80 : Right click the highlighted layers and right click. Click on Convert to Smart Object from the popup.
The layers have been turned into a Smart Object.

Step 81 : Click off the eye icon in Layer 1.

The image looks like this.

Step 82 : Press CTRL+T. A selection forms.

Step 83 : Hover your cursor n a corner handle. A two headed arrow appears. You can rotate the selection with it.

Step 84 : You can also use the corner handles to resize the Text.

Step 85 : Press ENTER. The image looks like this.

Step 86 : You can resize by dragging down the middle handle and also move the Text around.

Step 87 : Click the Tick Mark in the top panel.

Step 88 : Click on the Background Layer. Drag the lock to the Trash can.

Step 89 : Click on the New Fill or Adjustment Layer button. Click on Hue/Saturation from the popup.

Step 90 : In Hue/Saturation click on Colorize.

Step 91 : These are the settings I have given for the Hue, Saturation and Lightness.

Step 92 : Go to Filter>Render>Lighting Effects.

The Lighting effects dialogue opens.

Step 93 : Change the angle of the light by dragging up.
Click OK.

The image looks like this.

Step 94 : Click on Layer 2.

Step 95 : Click the Layer Effects button. Click on Inner Shadow.

Step 96 : I have set the Size at 122, Distance at 48 and Choke at 33.

Step 97 : Click on Outer Glow. We will leave the Glow Color at the default Yellow. I have dragged the Size to 139 and Spread to 6. Click OK.

Step 98 : I have moved the Text layer down.

Step 99 : I am changing the Blend Mode of the layer to Hard Light.

Step 100 : Press CTRL+T. A selection appears. Drag the middle handles at the sides outwards.
Press Enter.

The finished image.
Other photoshop tutorials are here


