


You can make different kinds of frames in Photoshop, but there is an easy way to do it. Just use a Brush.
You will find a variety of frame brushes here
You can download the ones you want or all of them. Why not? You should always have a good collection of Brushes besides the once built into Photoshop.
 This is what I will create and so can you.

The frame brush I would like yo use is this one. You can download it here
It is free. It has been made by Lileya

I will be using this free stock image also. You will find it here
It belongs to

Step 1 : Open a new White document.

Step 2 : Click the New Layer icon. A new Layer 1 forms.

Step 3 : Click the Brush Tool.

Step 4 : I will show you how to load a Brush easily in Photoshop. First click at the top. Then at the little arrow at the left and finally on Load Brushes.

Step 5 : Navigate to the folder where you downloaded the Brush. Click it and click Load.

Step 6 : Scroll down to the bottom in the Brush panel. The last Brush is the one loaded.

Step 7 : Click once with the Brush.

Step 8 : I have opened the downloaded image in Photoshop. Press CTRL+A (Select All), then CTRL+C (Copy).

Step 9 : Go over to the other image.

Step 10 : Click the Rectangular Marquee Tool.

Step 11 : Draw a selection inside the frame.

Step 12 : Go to Edit>Paste Into. In CS 5 extended it is just a bit different.

The image has been pasted in the selection, but it is a large image and cannot be seen properly.

Step 13 : Press CTRL+T. A selection forms. Press SHIFT+ALT and drag a corner handle to resize the image in the frame. Press ENTER.

Step 14 : The Layers pallete has the Frame layer on Layer 1 and the image on Layer 2.

Step 15 : Drag Layer 2 below Layer 1.

Layer 1 is now above Layer 2.

Step 16 : CTRL+CLICK the layer thumbnail of Layer 1.

Step 17 : The frame is selected by marching ants.

Step 18 : Click the Gradient Tool.

Step 19 : Click in the top panel to bring up the Gradient Editor and click on the Copper Preset.

Step 20 : Press SHIFT. Drag up with the Gradient Tool in a straight line.

Step 21 : Press CTRL+D to deselect. The frame looks like this.

Step 22 : Click the Layer Styles icon. Click on Bevel and Emboss.

Step 23 : Retain the Style as Inner Bevel, Change th Technique to Chisel Hard, Click the Gloss Counter and click on Ring Double. Check Anti-aliased. Do not click OK.

The framed image. Now to apply a Drop Shadow.

Step 24 : Click the Drop Shadow. I have set the Distance at 8, Size at 10, Spread at 2 and lastly reduced the Opacity to 50%. Now click OK.

Step 25 : Download this Wood Texture from here

Step 26 : Click on the Background Layer.

Step 27 : Press v on the keyboard (shortcut for Move Tool) and drag the wood texture on the other image.

The image looks like this.

Step 28 : Click the Crop Tool.

Step 29 : Press ENTER to apply the crop.

Step 30 : Click on Layer 2. Click on the layer thumbnail. A small frame appears around it when you click which means it has been selected and not the mask.

Step 31 : Go to Image>Adjustments>Match Color.

Step 32 : Change the Source to the wood texture.

Step 33 : Check Neutralise. Fade suitably. I have faded it to 23. Click OK.

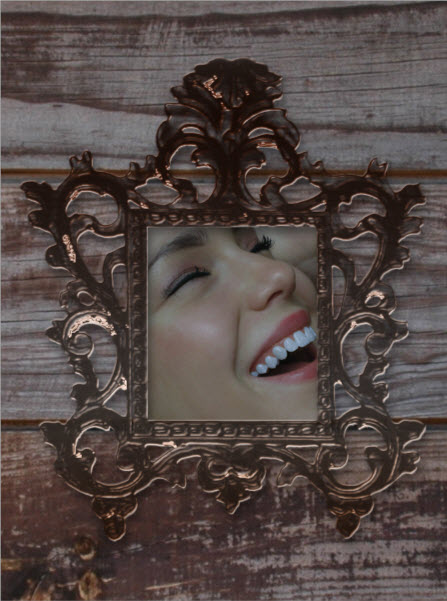
The finished image. Other Photoshop tutorials are here


