


Brushes are great for making posters. You have quite a lot built into Photoshop. There are more good quality Brushes available also for free on the internet. I will also show you the Quick Selection Tool. Whatever version of Photoshop you may be using, you must be using selection tools. The Quick Selection Tool is the newest and most powerful. It can make difficult selections easy and you can add and subtract from the selection as with the other selection tools.

This is the poster we will be creating.

In the Photoshop palette at left the first are the Marquee Tools.

Then there are the Lasso Tools.

There is the familiar Magic Wand tool and the new Quick Selection Tool. Let us see how it works.

After you click on the Quick Selection Tool, at the top you will find three icons. The first is the New selection.

Next is the Add to selection.

The last is the Subtract from selection. Let us see how it works.

These are free stock images of dancers. You will find them here
They belong to mjranum-stock

Step 1 : I have opened this image from among the dancers above.

Step 2 : Click on the New selection icon.

Step 3 : Click and drag to make the selection.

Step 4 : As you click and drag some portions may not be selected as here where a portion of the hair has not been selected.

Step 5 : Press ALT (Subtract from selection) and go over the edge and you can corrected the selection. When you press ALT the cursor turns into a minus sign.

Step 6 : The right side of the hand has not been selected as yet.

Step 7 : Press SHIFT (Add to selection) and add to the selection. When you press SHIFT the cursor turns into a plus sign.

Step 8 : I am keeping SHIFT pressed as I click on new areas to select.

Step 9 : Though the area beside the hand has been selected, the hand itself has not been selected.

Step 10 : The hand has been selected by keeping the SHIFT pressed. For tricky bits like the space between the fingers press [ (left square bracket) to make the brush size smaller and continue to select. To make the brush large press ] (right square bracket). The Quick Selection Tool acts just like a Brush.

The entire image has been selected.

Step 11 : Press CTRL+SHIFT+I to inverse the selection.

Step 12 : Go to Select>Refine Edge.

Step 13 : The Refine Edge dialogue box opens. Check Smart Radius.

Step 14 : First click on View and you will get a list of options how the image will be viewed. It is currently set at ' On White'.

The image looks like this 'On White'.

Step 15 : Next comes Edge Detection.
In the Adjust Edge I have given certain values for Smooth, Feather and Contrast. It will depend on your image and its resolution. This is a high resolution image. I have set the Smart Radius at 1.

Step 16 : In the Output, I have set 'New Layer'. I am clicking OK.

The image looks like this.

The Refine Edge has done a pretty good job.

The Layers palette looks like this.
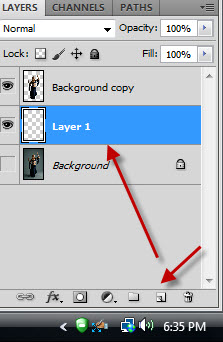
Step 17 : Press CTRL and click the New Layer icon. A new Layer 1 forms below the Background copy layer.

Step 18 : The Foreground/Background color must be set to the default Black/White. If it is not press x and then d on the keyboard to restore the default.

Step 19 : Press ALT+BACKSPACE to fill with the Foreground Color which is Black.

The image looks like this.

Step 20 : Click on Background copy layer and change the Blend Mode to Hard Light.

The image looks like this.

Step 21 : Press CTRL and click on the New Layer icon. A new Layer 2 forms below Background copy layer.

Step 22 : Press x on the keyboard to change the Foreground Color to White.

Step 23 : Click the Gradient Tool.

Step 24 : Click at the top to reveal the Gradients. Click on the first Preset -- Foreground to Background.

Step 25 : Drag up diagonally with the Gradient Tool.

The image looks like this.

Step 26 : Change the Blend Mode to Hard Light.

The image looks like this.

Step 27 : Lower the Opacity to 60%.

The image looks like this.

Step 28 : Click the New Layer icon. A new Layer 3 forms over Layer 2.
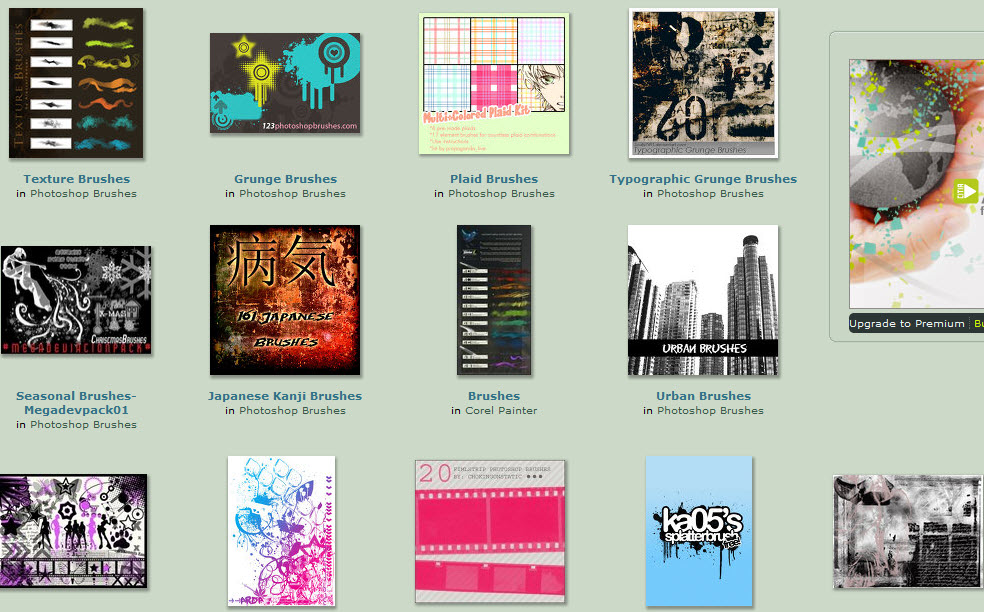
Now we need good, free Brushes. You will find them here

Download this Brush. You will find it here
It is from

I have downloaded the Brush to a folder on my computer.

Step 29 : Press b on the keyboard, the shortcut for Brush Tool. Click at the top and the side and click on Load Brushes.

Step 30 : I have navigated to the folder where I downloaded the Brush, clicked on it and then the Load button.

Step 31 : Click at the top to reveal the Brushes. Scroll down. You will find the downloaded Brushes at the bottom.

Step 32 : Click the New Layer icon. A new Layer 4 forms above Layer 3. Remember to use each of your Brushes on a new layer. That way, if you do not like an effect later, you can just delete the layer, while the rest of the composition stays intact.

Step 33 : I am clicking on Brush no 2192.

Step 34 : I am clicking once with the Brush.

The image looks like this.

After finishing work with a set of Brushes always Reset Brushes.

This dialogue box opens. Click OK.

Step 35 : Download this Brush from here

Step 36 : I have downloaded the Brush into the same folder. It is in a rar file. You have to extract it before you can load it into Photoshop.

Follow the same steps as earlier to load the Brush into Photoshop. Scroll down to the bottom of the Brush window and you will find them at the bottom.

Step 37 : Click the New Layer icon. A new Layer 5 forms.

Step 38 : I am clicking on Brush 2048.

Step 39 : Click on the Foreground Color. The Color Picker opens. Click on the Green in the Spectrum. Then pick a green shade from the left. You want the exact shade type in c2f488 in the highlighted box at the bottom and click OK.

The Foreground Color changes to the color selected.

Step 40 : Click once at the bottom of the image with the Brush. Do not forget to Reset Brushes.

Step 41 : Click the New Layer icon. A new Layer 6 forms above Layer 5.

Step 42 : Download this Brush from here

Step 43 : Load the Brush into Photoshop.

Step 44 : Change the Foreground Color to Yellow.

Step 45 : I am clicking on Brush 848.

Step 46 : I have clicked once in the middle.

Download this Brush from here

Step 47 : Click on New Layer icon. A new Layer 7 forms above layer 6.

Step 48 : Click on the Foreground Color to change to a light purple.

Step 49 : Click on Brush 2498.

Step 50 : I have clicked once with the Brush.

Step 51 : Click the New Layer icon. Layer 8 forms.

Step 52 : Go to Image>Image Rotation>Flip Canvas Horizontal.

Step 53 : Change the Foreground Color to a light Orange.

Step 54 : I am clicking on Brush 1668.

Step 55 : I have clicked once with the Brush.

Step 56 : Flip the image horizontal again.
That is all.
Other photoshop tutorials are here


